Dude! Take Your Turn!
A Gaming Life
Combat Commander – After Action Report – Scenario 22 – A Veritable Bloodbath

Going into Monday’s game of the monthly Combat Commander tournament, I was on a 4-game win streak, and I was Number 5 on the ladder!
The pressure was on, not only to maintain the streak, but perhaps to be playing for almost the top spot in August.
Would I be able to do it?
Let’s start at the beginning.
The Combat Commander ladder is the monthly tournament of one of my favourite games. Created and run by the distinctive Patrick Pence of Patrick’s Tactics & Tutorials fame (really! I’ve never seen anybody like him!), this gives us all a chance to play the game at least once a month, if not more.
Because really, Tony will play you any time, even while asleep!
It’s time for another adventure from the ladder where I demonstrate my prowess!
Or maybe demonstrate how badly I can play.
You be the judge.
This month’s opponent was John A, the first time I’ve ever played him. You get to play some new people when you’re near the top.
This month’s scenario is from the Mediterranean expansion, featuring a massive British attack against a small force of German conscripts and Volksgrenadiers, both very poor quality troops.
(Don’t forget that you can click on an image to blow it up)
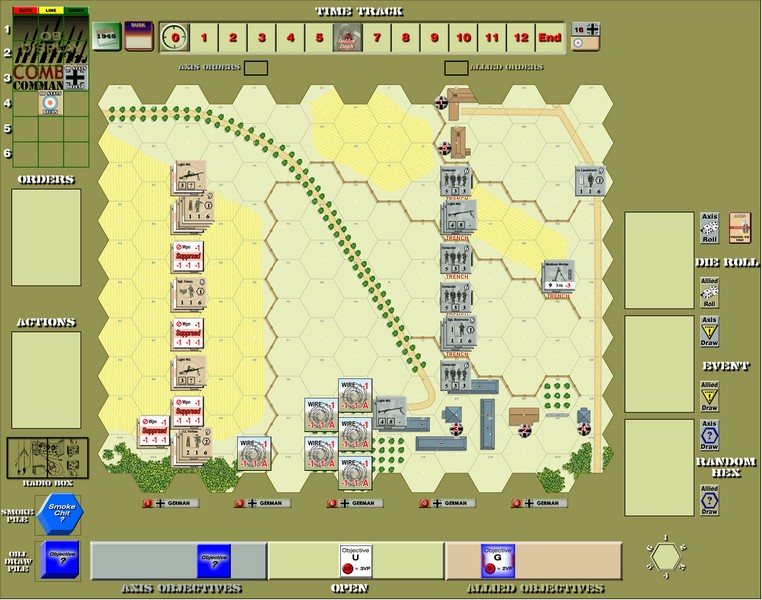
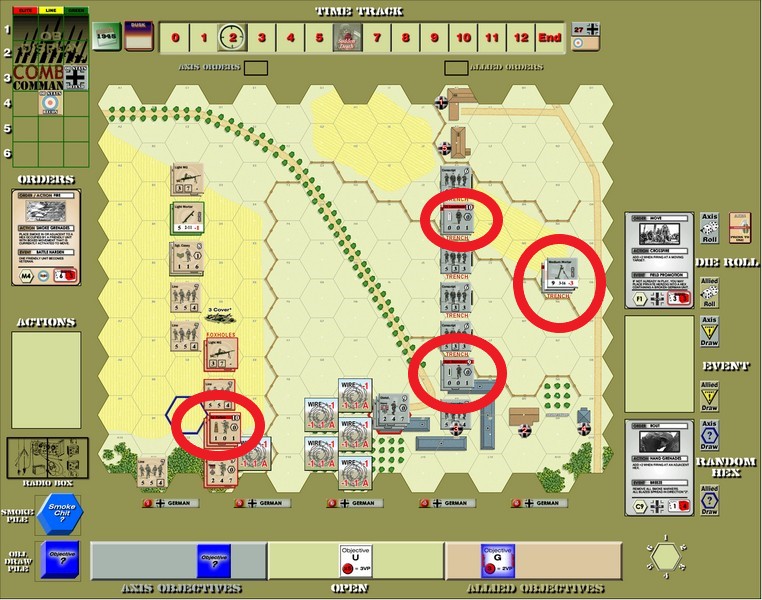
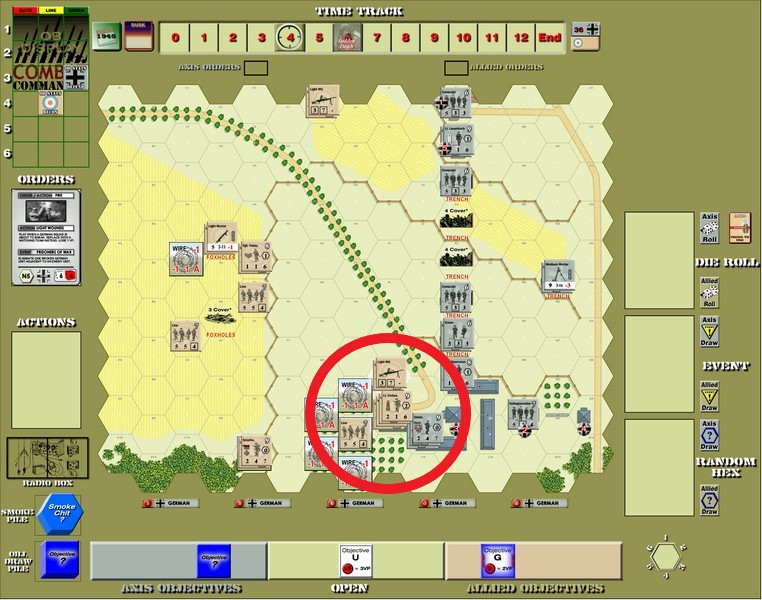
The British (tan – me) set up first on the left side of the board, 3 hexes deep.
The Germans (grey – John) set up second up to 12 hexes deep from the right side of the board.
There are a couple of interesting twists, though.
The Germans have to set up their trenches and wire before the British set up, and they can be 15 hexes deep (so basically anywhere on the map).
Secondly, the British squads (NOT teams and leaders) start out suppressed from the surprise firing of the German heavy machine gun.
The only other special rule is that each hex has a “dusk” hindrance equal to the time marker. So it’s getting darker as time goes on.
Sudden Death is at Time 6, so it could be a short scenario, or a long one.
That is a lot of open ground with just a little bit of hindrance for the British to run though.
Thankfully they have a mortar with smoke!
Let’s get started.
I started out with a terrible hand given the circumstances.
A couple of Move cards and a Fire card, but no Recover!
With all of those suppressed units, I wanted to rally them as soon as possible.
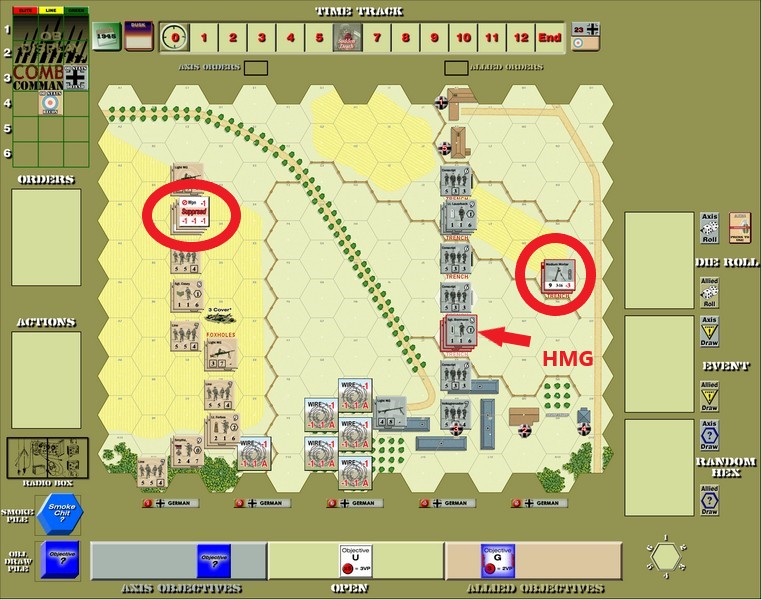
However, my mortar did try to cover the German HMG in smoke, but only succeeded in drawing a 2-hindrance. That’s no better than the orchards that they would be firing through anyway!
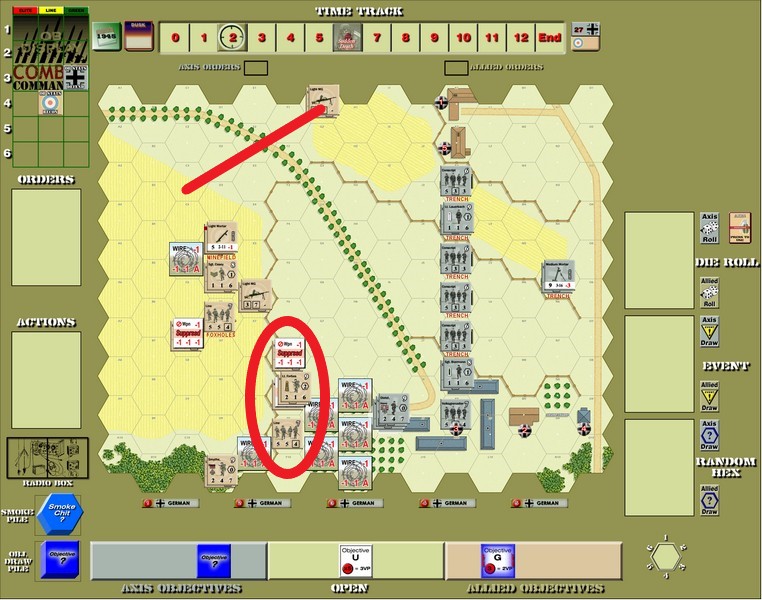
Even with that and without the Recover card, I did try to move Forbes and company in the south.
They paid for that.

The HMG opened up and I had what became a series of bad dice rolls, breaking both squads (but thankfully not my own HMG team)
To add insult to injury, he routed both of them! Not off the board, thankfully, but still away.
John then quickly shifted his men so that the HMG was not in smoke.
So I tried to smoke it again (since I still didn’t have a Recover card).
And promptly drew a 1-smoke.
Even worse!
After some discarding on both sides, I finally managed to smoke the HMG with a 6-smoke.
But still no Recover card.
I Advanced Forbes and some of his men forward and attempted to smoke the Germans in the forward positions, but to no avail.
Though the missed to-hit roll brought out the British Hero, Smythe!
That rallied one of the squads.
That was the extent of what he did the entire scenario, though.
Then, lo and behold, I drew a Recover card!
The Angels were singing from on high and everybody was in good shape again.
I had 3 Move orders…should I move forward?
It’s kind of dicey without another Recover card, though.
So I stayed put.
John switched his HMG back to the 2 smoke to make them viable again, then tried to take out the mortar team.
Thankfully only the squad with them broke.
More fire killed them outright, though a British sniper did break John’s mortar squad in the back.
Snipers were a thing in this game.
Then things started to look my way for an instant.
I still didn’t have a Recover card and John fired the HMG at the mortar again.
He used a Sustained Fire action to add firepower to it.
And promptly drew a 3-3 Sniper trigger. With Sustained Fire, a doubles result breaks the gun.
Snipers hit a random hex. If the hex number is 1-6, the HMG is repaired. A 7 or 8 and it’s eliminated.
He drew hex G7.
The HMG was out of the game!
Of course, Chatham and the squad next to him panicked on their morale check, but it was still worth it.
If I could draw a Recover card.
Which I could not.
The German mortar opened up, and finally the British mortar team broke, though Chatham survived.
My HMG managed to suppress the mortar squad, but on the morale check, John drew a Sniper that ended up killing Chatham.
Really????
Also in what became way too normal in this scenario, John did a low-firepower (2) attack on Forbes and his men, and rolled high.
In this case, a 12 Time trigger, which meant time was finally advancing.
And Forbes broke on the easy morale check!
With the HMG gone, John had Lauerbach and one of the LMGs up north fire at the broken mortar team, trying desperately to kill them.
He sustained the attack again.
And promptly drew a 1-1 Jammed trigger.
The doubles broke the LMG and the Jammed trigger eliminated it.
Yay, me!
John could have given men the Initiative to re-roll that, but I don’t recall it even being considered.
(As it turns out, John’s next order was to try and Rout me, and the first card he drew was a 1-1 Jammed trigger, so even if he had given me Initiative, the result would have been the same!)
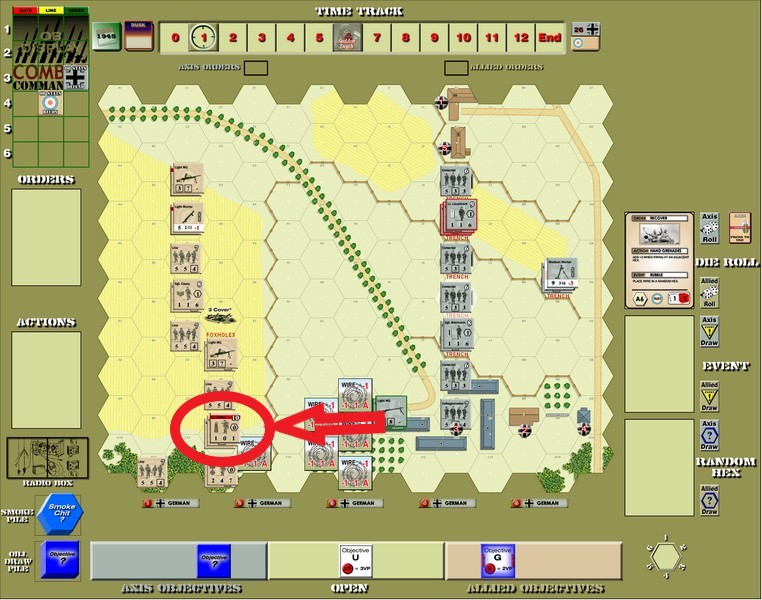
Biermann, desperate to have a machine-gunner to lead, slowly Advanced his way down to the squad/LMG in the forward position in the south.
Who knows what’s up with him?
Then, lo and behold, I finally drew another Recover.
Only my second of the game!
And Forbes apparently was happy hiding in the open ground as he failed to rally, as did the broken squad in the north.
Though the mortar team did rally.
They were stalwarts.
Casey jockeyed for a new position in the north for the British and the deck ran out, causing another Time trigger.
When the German Hero Dietel showed up, Biermann decided that maybe he didn’t need to go lead the MG and started heading back north.
Which prompted some British retaliatory fire, breaking him!
Finally, Forbes managed to Recover (only my 3rd Recover card so far). In doing so, he sent a Sniper that ended up breaking the German mortar squad as well.
The squad in the north also rallied.
It was time to get a move on, I think.
Except now that I had an extra Recover (the 4th one), I had no movement!
Some British fire broke Lauerbach with a nice Air Support event, and things were looking great!
Until one of the German morale checks caused a Sniper that once again broke Forbes.
What was with that man???
I did manage to lay some 5-smoke on Dietel and his men, meaning no more low-firepower attacks that seemed to frighten Forbes.
Forbes quickly recovered, thankfully, but I still had no Move cards.
In another demonstration of Combat Commander luck, I fired the HMG at Biermann to see if I could kill him. I drew a 12 Time trigger.
John couldn’t have that (he would have certainly died) so gave me the Initiative. I drew really badly.
The first German morale check was a 12 Time trigger.
I couldn’t let Time advance that quickly, so gave it right back to John.
Even more typical, John had a Recover card and not only rallied everybody, but drew an Interdiction event that suppressed one of my squads, and then an Interrogation event that let him look at my hand and discard my Recover card! (the 5th one I had drawn).
It was time to Move out finally, even with no Recover card.
Forbes and his men started advancing forward, under some light fire from the building, but I drew another Interdiction event!
Another British squad suppressed.
The move continued…and another Interdiction event!
Three British squads suppressed now.

But at least they were forward a little bit.
Time was getting on, so I thought it was time to start moving towards the Germans, especially since they only had one machine gun now.
So Forbes and friends Advanced (I wasn’t going to give them a shot in the open yet). They climbed over the fence in front of them and started planning their attack.
I also wanted John to have to think about the north a little bit, so one squad took a runner to see if they could outflank the Germans.
That forced John to move Lauerbach and friends northwards. My guys even got a small fire attack on the moving squad, which caused a Sniper that hit Dietel’s squad!
That was nice.
Some discarding ensued, including German discarding, which let my mortar team destroy the minefield they were in and were hesitant to move out of (especially because the team was still broken).
John kept trying to fire his mortar at my mortar team, because it worked once breaking them, why not see if it can kill them?
But he kept missing…and missing…and missing. One of the attempts caused another Interdiction event, though. Yet another suppressed British squad.
I had finally drawn a Recover card, though! My 6th.
And another one (my 7th), so it was time to move out.
Time was advancing, though.
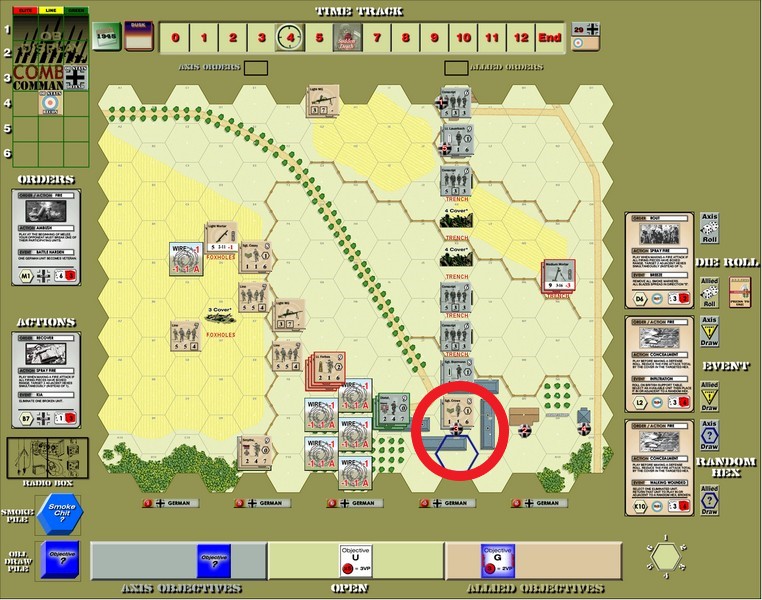
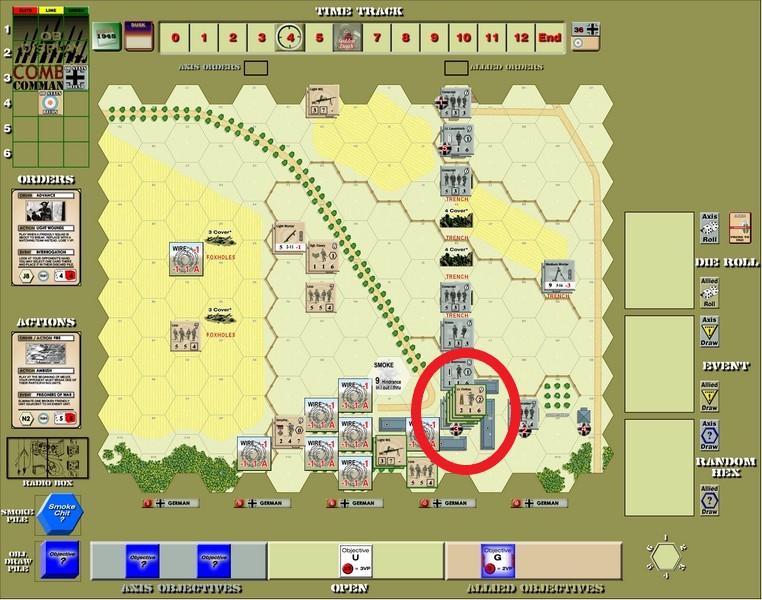
Here’s the situation after the 4th Time trigger.

Forbes now has a squad with him, for a formidable stack. The guys in the center are also slowly advancing.
Probably too slowly.
Some desperate fun did happen shortly afterwards, though.
I’m trying to advance on the southern flank to melee those guys and start turning the flank.
I have an Advance card and an Ambush card, hoping for another Ambush (and another Move/Advance to get close).
On a British morale check, I drew an Infiltration event, which let me bring in a reinforcement in or adjacent to a random hex.
My roll was really bad, bringing in either a kind of crappy leader or a really crappy territorial squad (or another mortar team).
I decided on the leader since I was short one and I didn’t know where this one would land.
And it landed right on top of a German unit.
I could have gone next to it, but I was a bit desperate. John had a huge point lead on me, so I knew I wasn’t going to win by points. I needed to eliminate 6 Germans.
I took a chance that John wouldn’t have an Ambush card (or even two). With the squad broken, John only had a 2-1 advantage on me, and I didn’t care of we had mutual annihilation.
Crowe could be a hero!
I drew my dice roll card…a 2!
Damn it, I need this. So off the Initiative goes.
And I drew another 2.
Crowe died, not a hero.
Still, I had a chance.
Forbes advanced, fired a heavy shot at Dietel that broke his squad, and moved next to them.
I had an Advance card, but no Ambushes or anything.
John didn’t know that, though, so he backed away deeper into the building and then rallied the squad.
I advanced into the building so I had some cover at least.
I now had two Recover cards (8th & 9th) but no more Movement or anything.
I was able to do a massive fire attack and break everybody in the hex, though.
Didn’t matter as they rallied really quickly.
While I was waiting for my Advance card, Dietel thought discretion was the better part of valor and moved out of the building and into Objective 3.
I was able to move next to them again, though.
Then, it finally happened.
An Advance card, two Ambushes, and it was time for Forbes to earn his pay.
Dietel died in the Ambush and I had a 13-5 advantage on the squad.
Not only that, but the German melee roll was a Walking Wounded event. Since no German units had been eliminated yet (Dietel doesn’t count), my dead squad came back into the middle of the battlefield.
However, it may have been too little, too late.
We were two Times away from Sudden Death and both of our decks were really low.
First John’s ran out. Some more fire ensued, and I just have to note that another German sniper broke Forbes.
Later another German sniper broke a British squad.
Like I said, the snipers were quite accurate this scenario, though they only actually killed one unit.
Anyway, my deck ran out too, so it was time for Sudden Death.
I needed to draw a 6 or higher in order to keep going.
Easy to do, right!
Nope.
I drew a 2.
What a fitting end to some really bad dice rollling.
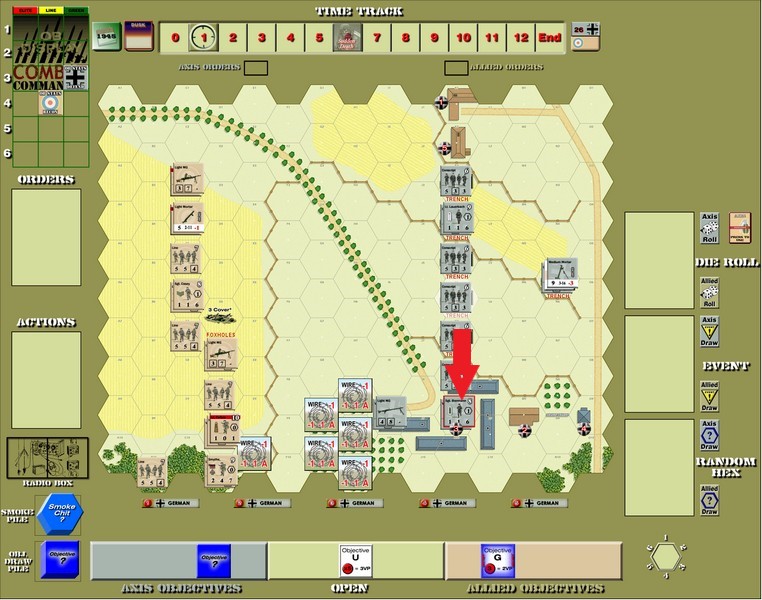
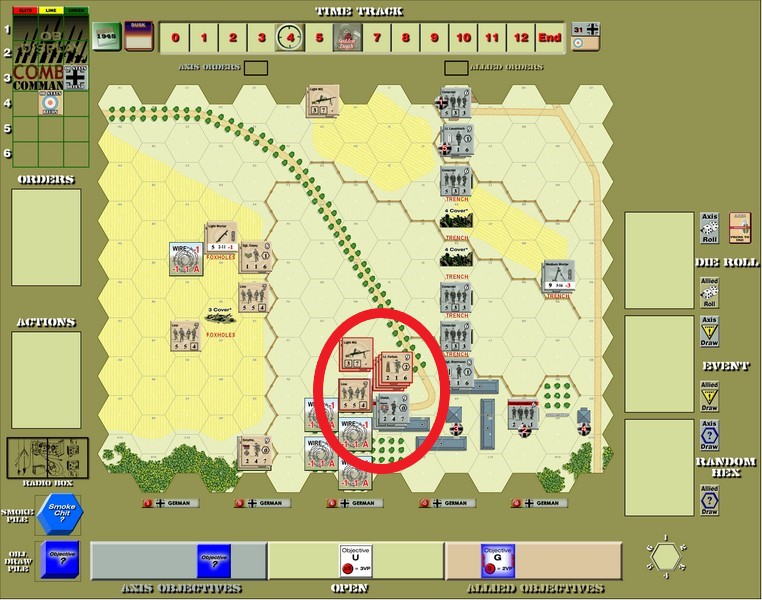
Here’s the final situation.

John won the game with 28 points after objectives were revealed.
Most of the time, the game would have continued. I may have been able to pull something out with one or two more rounds (as long as early Time triggers weren’t pulled), but I never got that chance.
The scenario did not live up to its name, with very few units killed. Yes, there was a Walking Wounded event, but ultimately there was one German squad dead and two British leaders.
I know I wasn’t aggressive enough, considering the British can lose a lot of units before surrendering and the Germans can only lose 6. Too many times I didn’t move because I didn’t have a Recover card but I did have a Move card. Sure, sometimes you have to wait, but I think I waited too much.
Things went back and forth throughout the game, which is just typical Combat Commander. I couldn’t Recover my initially suppressed guys for a while, but then John ended up eliminating two machine guns, including his HMG which can be merciless.
At that point, I should have ran across the open ground, but I didn’t.
That was my doing. John ultimately just outplayed me.
Still, without that early Sudden Death, who knows what would have happened? Things were starting to turn my way a little bit.
John was a great opponent, very personable and fun to play against. We had a lot of laughs the entire two-hour scenario length. I hope he does well against one of the top guys next month!
Anyway, I am now 21-17 on the ladder and I’m sure I’ll fall out of the Top 10.
But next month is a scenario from the Paratroopers battle pack, so it should be a good one!
If this interested you at all, why not join us on the ladder?
We’re a great bunch of people who are always willing to play a game with you. And you get at least one game a month regardless!
I’ve met some really cool people on here.
Until next month, my advice to you is just run across the battlefield.
What’s the worst that can happen?
Combat Commander Ladder – After Action Reports
To see all of my Ladder After Action Reports since May 2021, go here!
