Dude! Take Your Turn!
A Gaming Life
Combat Commander – After Action Report – Scenario 118 – No. 4 Commando

Combat Commander can be a weird duck sometimes.
One day, luck is swinging wildly like a drunk pool player swinging his stick around because he scratched on an easy 8-ball shot.
The next day, things pretty much go in a straight line, from one end to the other with no deviation, like Johnny Fever after a few drinks.
(10,000 points if you get that reference in full, not just the name)
Today’s ladder game was one of the latter.
In other words, welcome to another tale from the Combat Commander ladder, that monthly tournament of one of the best games out there.
Run by the miraculous Patrick Pence (he of Patrick’s Tactics & Tutorials on Youtube), the ladder gives you a chance to test your mettle against over a hundred different possible opponents on a monthly basis (that’s one a month, not hundreds all at one time. We’re not Rambo or anything).
This month’s mission is from a series of scenarios published in the C3i magazine.
And it is also my 4 -year anniversary on the ladder! I started playing this great game regularly in May 2021.
It’s been a wonderful 4 years.
My opponent this month was Frank E, another eastern opponent so we made a Saturday morning work for our game.
The scenario takes place during the Dieppe commando raids on the coast of France in 1942. A group of intrepid Brit commandos (and one US consultant team) face off against a small group of German defenders.
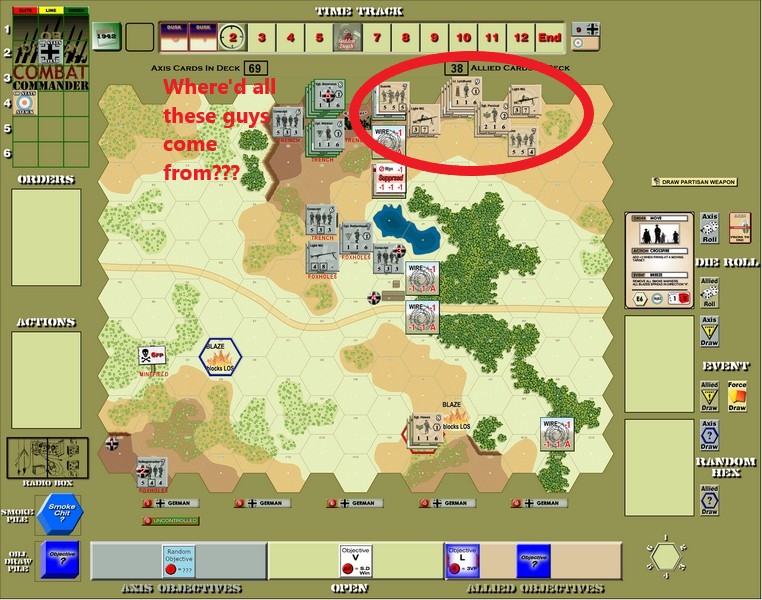
Here’s the initial setup.
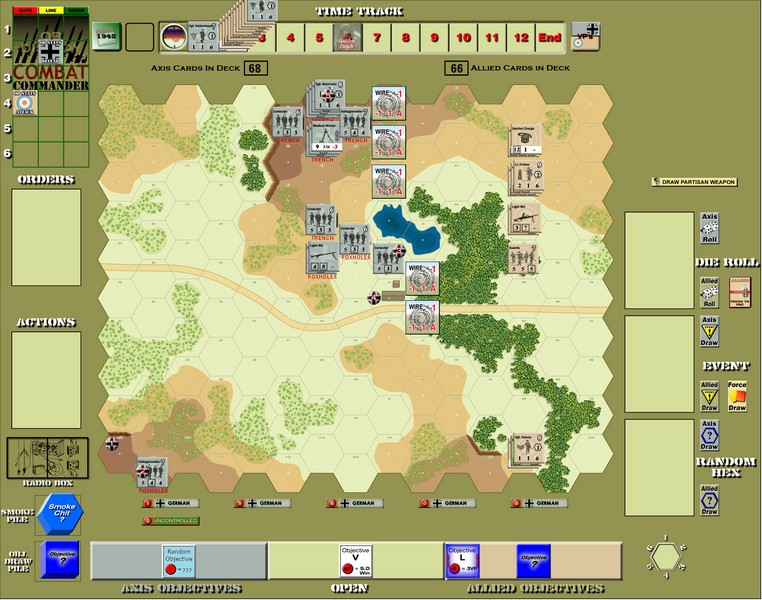
Don’t forget that you can click on a picture to blow it up.
The Germans (grey – me) can be positioned 12 hexes deep from the left side of the board. There’s one big hill peak on this map, so of course my Heavy Machine Gun went up there, with the mortar right below it. There are so many trenches and foxholes that the Germans don’t need to worry about being out of cover at all.
I also set up a token force near the buildings in the centre of the map, and one token squad in the bottom left to contest those two objectives, if Frank ever came over there.
The Wire and the lake are positioned to hinder any northern British move, leaving only the south open.
The Brit force (tan – Frank) starts out with a relatively small number of units and can set up three hexes from the right edge. Frank positioned his mortar down south to hopefully lay smoke on the German positions but the rest were poised for an assault through the wire up north.
A few special rules round out the scenario.
First, the German defense was disorganized at first. Hence the one leader.
On Time Track 1 & 2, a new German leader appears and can be placed with any German unit.
Secondly, the attack was at dawn, so the first two time periods have a hindrance to all fire equal to the range between the units.
Thirdly, see all those British reinforcements on the 2 Time Track?
Yeah, they come onto the board in a random group of hexes based on a die draw. They could appear on any board edge, potentially.
Finally, while units can exit the board, they don’t get any benefit from it.
With all of that, the British take the first move and it was time to start.
And me without a Fire card!
Lt. Forbes and his men took the opportunity to charge the Wire in the north.
While I didn’t have any Fire cards, Forbes did stumble into a minefield.

Sadly, the only thing that happened on both attacks (coming and going) was that Forbes broke.
Which isn’t bad! Just less than I was hoping for.
I had to discard the first round, and then started what happened for most of the game. I seemed to always have a Fire card when I needed it.
Fire finally started blazing down the hill, but the only result was an actual blaze blocking the British mortar and a Sapper event that let Frank remove the Mines.
In hindsight, maybe removing one of the Wires might have been better? But who knew what was going to happen at that point?
An attempted Rout of Forbes did bring out a German sniper which was surprisingly effective, breaking another British squad.
It looked like it might be one of those days.
Thankfully not for me this time.
Frank quickly recovered Forbes, though the squad refused to rally.
Would you rally if you were sitting in open ground downhill from a heavy machine gun?
I sure as hell wouldn’t.
More German fire rained down, and another sniper hit!
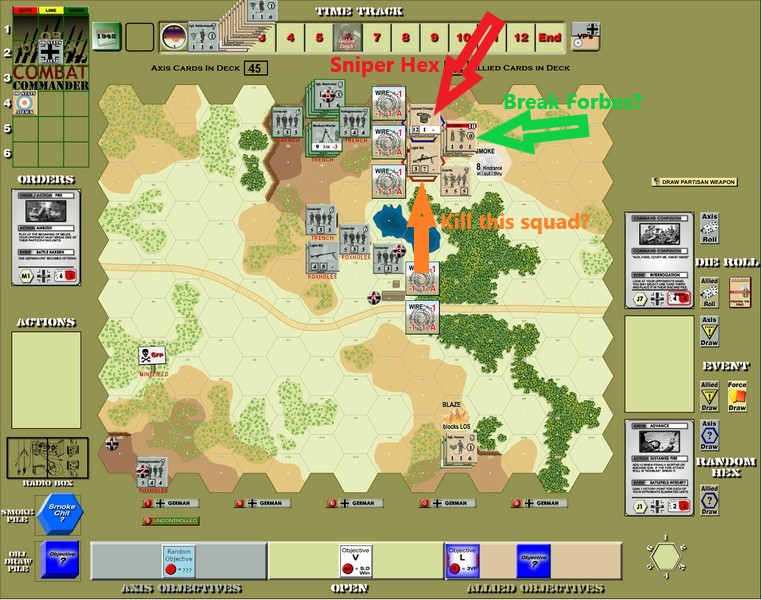
Here was my choice: break Forbes (the picture was taken right after my choice, so I guess this is a spoiler!) or kill the squad that I was firing at, and who potentially might die anyway due to the fire attack.
I chose Forbes, and it turned out to be a good choice as the squad did succumb.
But first Frank gave up the Initiative to try to save it. It didn’t work.

More fire caused the first Time trigger on a British morale check, bringing on Cpl Rettenhaus, who was awoken from a deep sleep by all this annoying noise.
The British squad with the Satchel Charge jumped into the Wire, perhaps to prepare for melee in the first trench? Since they can’t use a weapon from Wire, the Satchel Charge was useless at that point.
One of the rare times I didn’t have a Fire card!
Some more movement and I did have one.
The HMG opened up on the broken Forbes. A low roll meant he’d probably be fine unless he rolled a 2 or a 3.
Oops, he rolled a 2.
Forbes didn’t even have the pleasure of joining his men in the Wire before being eliminated.
The same fire order broke the Commando in the Wire with the Satchel Charge (sounds like an accusation from Clue!)
At this point, I had three Fire cards (including an Ambush) and an Advance card.
I thought about raining fire down on that squad again, but ultimately decided to send the newly Veteran squad into the Wire to take them out hand to hand.
Frank didn’t have any Ambushes, and my Ambush killed the squad with no issues.
Though they were still in the Wire!
More German fire broke another squad in the Wire but brought out a Brit reinforcement squad as well.
And then another Time trigger, bringing out the reinforcements!
Cpl Winkler went to join Biermann’s group in the trenches and it was time for Frank to roll to see where his came in.
Would it be behind my lines with a clear beeline, wire-free, to the trenches?
Or could it be in the worst possible place, joining the chaos that was already happening up north?
Yeah, Frank drew the latter.
They appeared on the edge from I1 to M1. There are so many units filling such tight spaces that he had to place one squad in melee with my guys in the Wire.
First, we finished my Fire order, and now my guys had multiple targets!
(turns out that we should have done the melee first. Oops!)
The British squad in the Wire died.
The HMG did a Spray Fire to hit two of the newly-arrived stacks, including Lt. Lyndhurst.
Three of the four units, including Lyndhurst broke.
Welcome to the fight!
It was time for the melee in the Wire. Frank’s attack value was an 8 and mine was a 9, killing the new squad before they could do anything.
One of the reinforcements ran up into the southern Wire, and were broken on my turn, though a British sniper did break Biermann.
This actually meant something because in the same Fire order, suddenly there was no leadership and one of the units was no longer in range.
The resulting British morale roll barely passed.
Thankfully I had a Recover card so all was good.
Frank desperately tried to smoke the German position with the new mortar, and drew a huge 8-smoke.
With the HMG smoked, the Germans in the building wanted to get in on the action.

The broken Brit in the Wire swiftly died as well.
The Brits were three dead units away from Surrender (six units were dead) and not much to show for it so far.
To try to start something, Frank advanced a unit into the German unit on the Wire’s hex.
Little did Frank know that I had drawn not one, but two Ambush cards on my last draw.
They died quickly too.
My squad advanced out of the Wire and back into the trench at that point.
There was a lot of firing and British moving, but nothing much happened. A German leader was broken for a turn but I had only one card to draw on my turn and it happened to be a Recover card.
That’s just how things went this game.
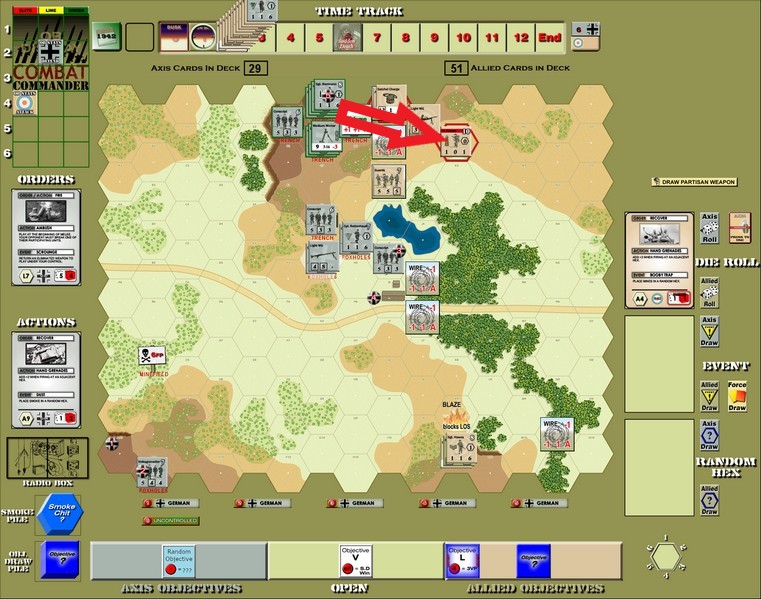
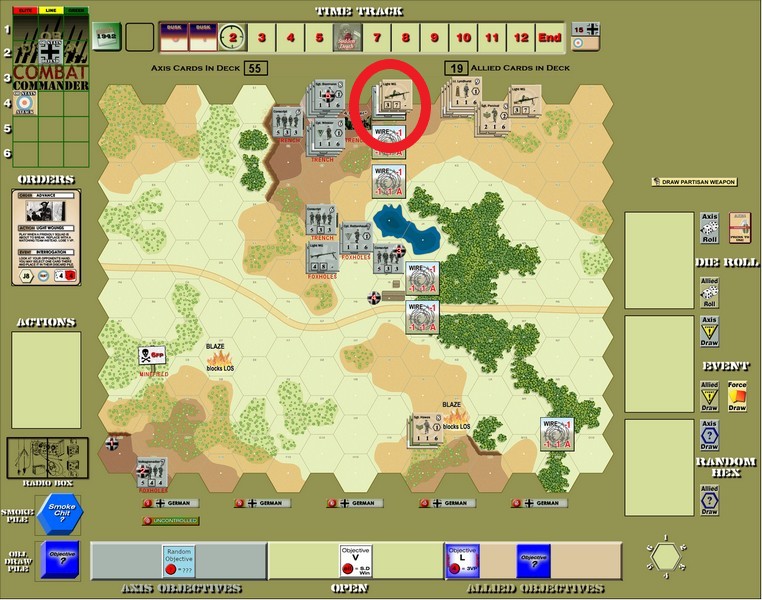
Here’s the situation sometime during Time 3.
The British were advancing, just trying to force something to happen up there.
Another German Time trigger on a morale check caused one of the huge smokes to go away, giving free rein to the HMG again.
I took advantage of it, breaking Percival (he only needed a 5 to not break!)

The British leaders were quite disappointing in their ability to stay unbroken.
A huge fire attack took Percival out too, along with breaking the other two British squads.
One away from Surrender.
More German fire broke the squad with the Flamethrower who had also advanced into the Wire, but they quickly recovered.
After more exchanging of Fire, a massive German attack finally killed another British squad in the Wire, ending the game due to British Surrender.
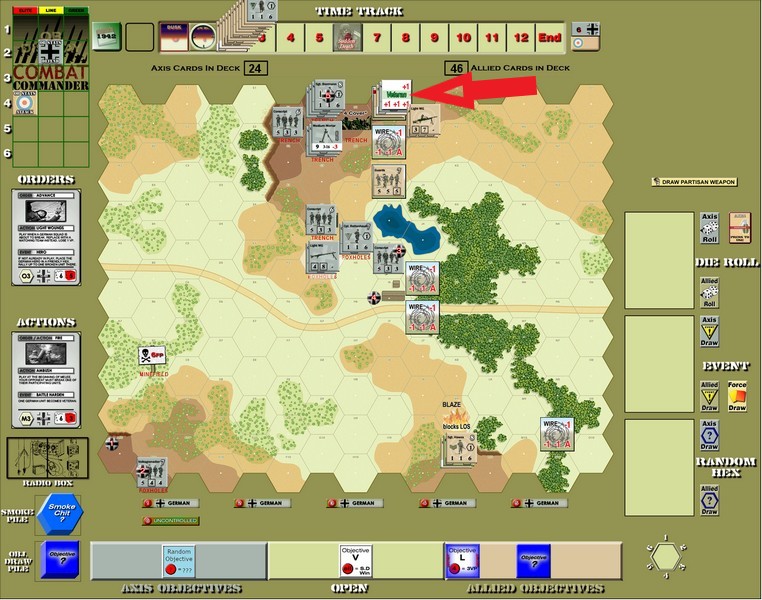
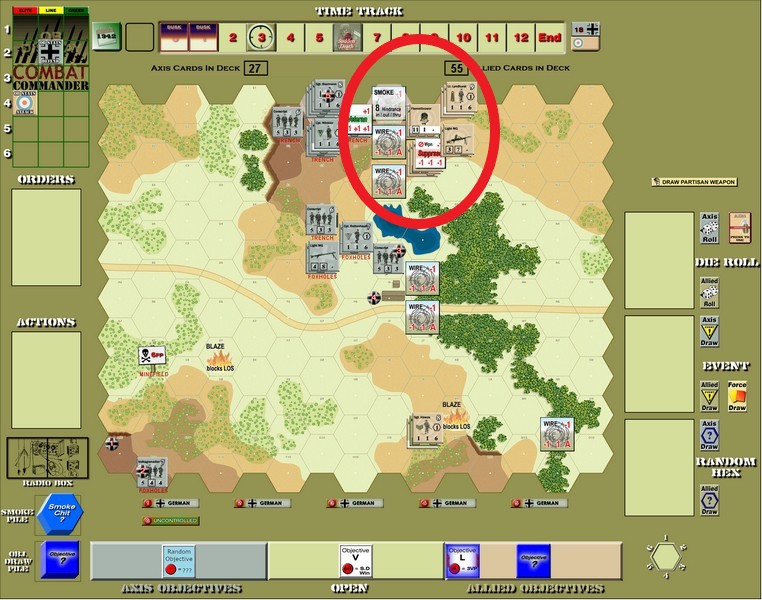
Here’s the map at the end of the game.

Note the two huge blazes! One had no effect on anything but the other one kept hindering the original British mortar.
Unlike last month, where I suffered from one huge luck swing that ended up killing me, this time the luck was in my favour from the start and Frank couldn’t do anything about it.
I actually drew 3 Interrogation events, forcing him to discard a card. Twice it hurt!
Then there was the bad roll on where to place his reinforcements, which caused one unit to die immediately and three more to break immediately. I think they ended up living (for a while), but it was still a false start. Especially when one of the rolls would have had them come in on my completely unguarded left flank.
Sure, the HMG would still have been able to rain fire down on them, but one thing Frank was usually able to do is get some smoke out there.
The main Objective marker has the condition “if someone controls all objectives at Sudden Death, they win immediately,” and the way things were going, that would have happened even if I hadn’t won by Surrender.
I felt kind of bad with the way things were going, but Frank was a great opponent, always fun and optimistic. I have to say that I may have ended it before the official end of the game if I had been in the same position, so kudos to him for sticking it out.
I know he’ll have better luck in the June scenario.
But I also didn’t tempt fate since I have been known to get hammered by her.
A couple of times I almost used Sustained Fire on my HMG attack, but decided to be safe and not do so.
Anyway, it was a good game and Frank was very fun to play against.
This win puts me back up to 25-23 in my ladder career.
Next month’s scenario is from the original Combat Commander: Europe base game, so it should be interesting!
If you enjoyed this, why not join us on the ladder so you too can play this wonderful game often. There are tons of opportunities to play pickup games outside of your scheduled one.
And that’s just with Tony!
Until next month, my advice to you is to place your Wire judiciously.
It can save your ass.
Combat Commander Ladder – After Action Reports
To see all of my Ladder After Action Reports since May 2021, go here!
