Dude! Take Your Turn!
A Gaming Life
Combat Commander After Action Report Supplemental No. 4 – Scenario 89 – Beneath a Steel Sky

Since my May Combat Commander ladder game isn’t until later this month, I thought I would share a previous supplemental adventure that I had back in February with a member of the ladder.
The March ladder scenario is always taken from the Sea Lion battle pack, and I thought it would be cool to try and guess what the next month’s scenario would be.
I was wrong, but it was still a fun scenario!
Eric and I finally hooked up for a game after numerous times of one of us not being available when the other posted in the Discord “Anybody up for a game?”
It was a nice and peaceful Friday night, which is always great.
For those who don’t know, the Sea Lion battle pack is a series of scenarios about the hypothetical German invasion of Great Britain in 1940 after the fall of France.
We decided to try Scenario 89, Beneath a Steel Sky, which portrays the German (Eric – blue) attack on the British (Me – tan) naval base of Portsmouth after establishing a beachhead on the coast.

(You can click on the pictures to blow them up)
The scenario has a couple of interesting special rules.
See that artillery marker in the 3 slot on the Time Track at the top?
Once the Time marker reaches there, there are no more Snipers. Instead, you resolve a 10 firepower fire attack from bombing raids against all units in the random hex drawn. Doesn’t matter if it’s yours or your opponent’s!
The bombing attack will add Wire (rubble) to the hex if it’s a building hex and add Foxholes to a non-building hex, both eliminating any fortifications that are already there.
Once Time 5 happens, Exit points become double (you can see it on the Time Track as well).
The British Molotov Cocktails go to the Time Track (any space I want) when used rather than being eliminated, coming back to a British unit when Time reaches that number. If the Germans eliminate a British unit holding one, they get to take possession of it rather than having it eliminated too.
Would I be able to beat back the merciless German onslaught?
Let’s find out.
(And seriously, let’s find out because I don’t even remember!)
I set up the British to be able to cover both avenues of approach to the big central building, with the three Wire to prevent sneaking around or through while covered in Smoke (the Germans can use the Smoke Grenades action and also have a Mortar that can fire smoke).
The two buildings behind the British lines (Objectives 3 & 4) are worth 7 VP, so it’s important to hold on to those!
Eric opened with merciless fire against Percival in the central building, breaking him and his squad with a high roll.
Thankfully, I started with two Artillery Requests (useless except that they had the Defender-Only “Hidden Pillbox” and “Hidden Entrenchments” actions, which are nice), a Fire/Ambush card, and a Recover.
So their broken state didn’t last long.
So he fired again!
And drew a Time trigger. A 12 is a massive fire attack, so Eric decided to keep it.
Percival had had enough of that, so out the Pillbox came (the central building is an Objective building).
While the pillbox saved the squad, Percival broke again.
Eric kept firing at them, but while the squad finally broke, he couldn’t eliminate them.
Then one of those fires caused a British sniper to hit Biermann, to hopefully put a stop to all of this.
Of course I had no idea if Eric had a Recover card, and I certainly didn’t! So Percival and his men Advanced out of the Pillbox to see if they could find a Recover card somewhere.
Maybe somebody dropped one when they abandoned the building?
Lo and behold, they found one!
It was hidden in somebody’s desk drawer.
Somebody was stealing office supplies.
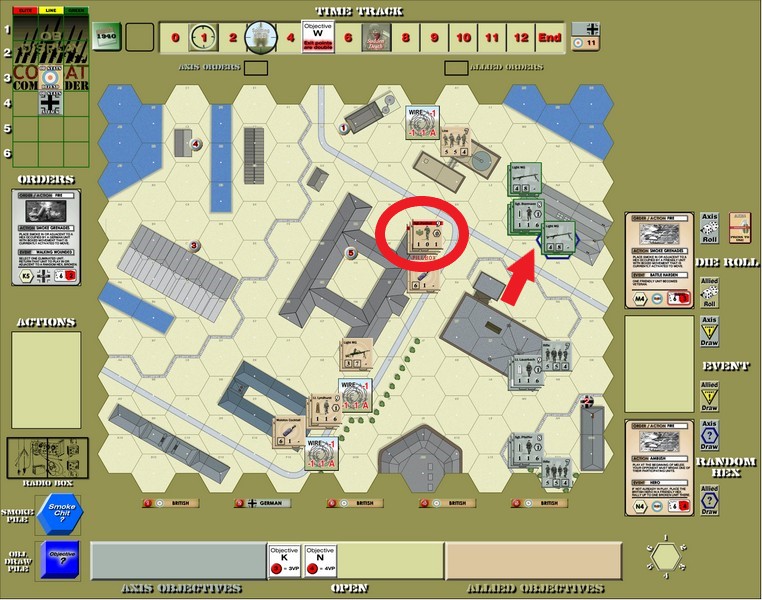
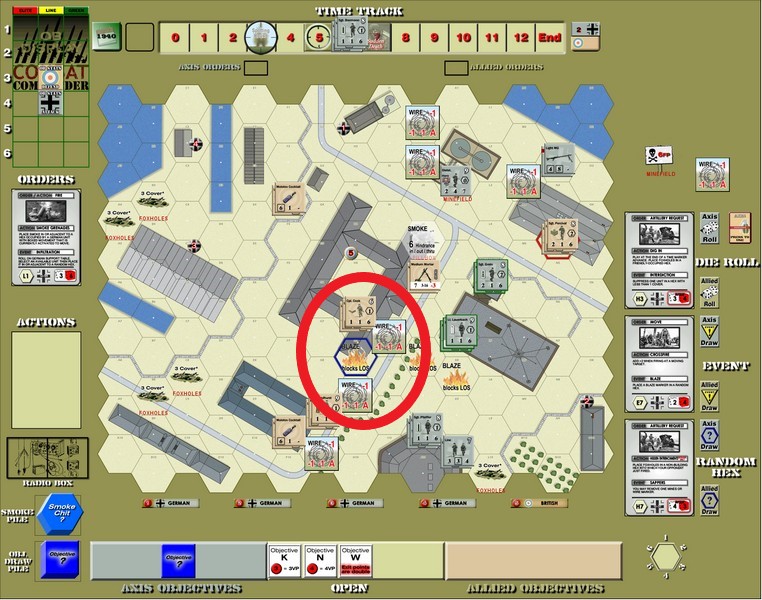
After some fire back and forth that didn’t do much (except breaking a German moving unit that recovered quickly), Eric moved Biermann and his men out to try and take the northern route past all these British guns.
One stack stumbled into Mines and Biermann himself into Wire.
And brought out Dietel, the German Hero!
Not that the Mines and Wire really affected anything, but it stopped them.
For now.
Biermann advanced off the Wire and into the building, making things really hairy for that squad up there.
But they survived a point blank attack from Dietel and his men.
Percival took the opportunity to move back into the Pillbox, for safety but also to be able to see more stuff in case the other squad up north succumbed.
Eric had everybody but Dietel jump into the squad’s hex (the minefield didn’t do anything, sadly), and the squad died. Though Eric was overstacked so he had to kill a German Team as well.
Lauerbach and his men moved through the German central building to see about attacking the British centre.
Some firing occurred, not doing much.

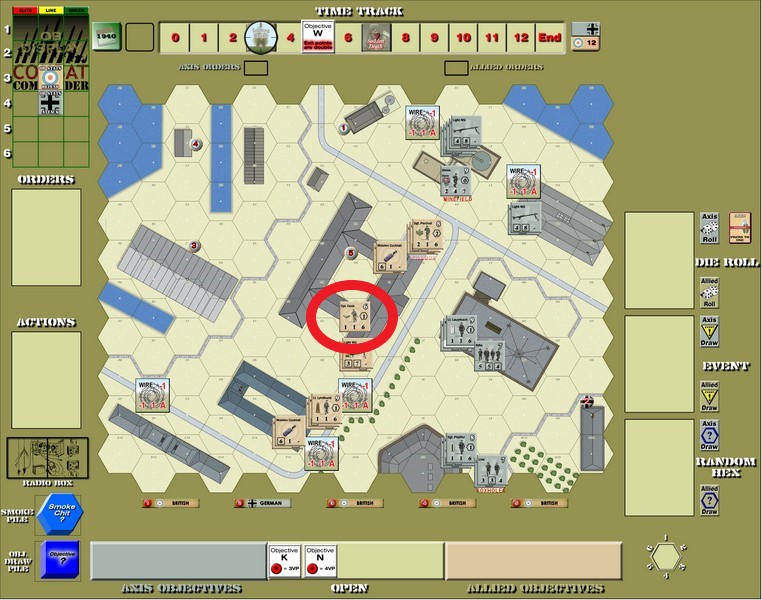
But Eric’s deck ran out so another Time trigger. Here’s the situation at that point.
The German mortar tried to cover the pillbox in smoke, but unfortunately it was only a 2 hindrance smoke.
Then the action that all Defenders anticipate with great relish.
Eric discarded and I had the Hidden Unit card!
The draw brought Corporal Cook out, and also ran my deck out.
The bombing raid was about to begin!
The smoke on the pillbox also dissipated with the Time, so Eric tried it again.
And drew a 1 hindrance smoke.
I think they got water on those mortar shells or something.
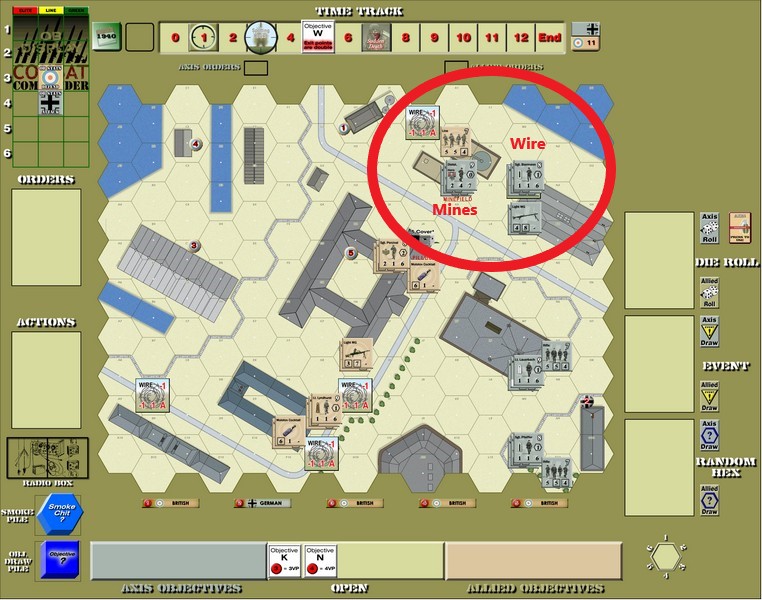
Then Biermann started his move in the north, and not only came under fire but also stumbled into more mines.
That British squad had really booby-trapped the building before they died.

While the Mines didn’t do anything, one squad did break under fire.
They quickly recovered.
A couple of ironic things during this whole sequence too. The Snipers are part of a bombing raid and cause either Wire or Foxholes in the hex they land in.
The first two snipers happened during this attack, and both of them landed in water hexes, meaning nothing happened.
That would change.
Eric finally managed to get a 9 smoke onto the pillbox, though!
Biermann took that opportunity to move out of the building, but the Mines broke the squad again. That halted them in the open.
And the squad not shrouded in smoke managed to actually kill it!

They kept moving, though the team also broke.
They stopped moving in the road, which made the next Recover action actually not work.
Too bad for them.
Eric had also drawn a Reinforcement event earlier, bringing a new leader onto the board.
With my guys having fired and with the pillbox covered in smoky stuff, Eric took the opportunity to run some reinforcements Biermann’s way.

While Sgt. Grein went to reinforce Lauerbach’s building.
Eric had gotten around me!
That wasn’t good.
He also did some repositioning to make things a little more efficient, and to take Objective 1 in case one of us got an event that gave us VP for holding objectives.

I was starting to despair a little bit. He could take buildings 3 and 4 really easily and then exit off the board (though I later realized that he would have to leave somebody behind to make sure I just didn’t take them back).
Sure enough, that’s what he did.
But no exit points or they wouldn’t be his for long.
My one squad with the Molotov was already moving back to see what he could do about it.
After some ineffectual firing, Eric had to discard again.
And I had the Hidden Unit card again!
Wow, that was fortunate.
I brought a Medium Mortar and team out…and then promptly placed it so it couldn’t fire at anybody because they were too close (minimum range of 3 and the Germans were 2 hexes away).
That was stupid.
And then I got lucky.
First, the German deck ran out…and at the same time, a Sniper/Raid hit, and hit hex I7.

Right in front of Corporal Cook!
Remember, a building hex getting hit causes Wire/Rubble, which just bolstered my defenses because it was in the perfect position to defend Cook.
The smoke covering the pillbox also dissipated with the Time, meaning Percival was back in business.
Eric tried again to smoke the Pillbox, but they must have found the wet shells because it was only a 1 smoke.
He continued to try and fire at the mortar, and drew a Time!
Now Exit points would be doubled.
That made Eric’s choice for him. Biermann quickly ran off the board.
The Germans were at +2 VP now.
Then more chaos happened.
Percival decided since there was no longer a threat in the north, it was time to get off the board.
Juicy, double VP! And when Time happened, they would come back on the British side of the board and quickly take the two objective buildings.
So he made a run for it.
First German fire, a Blaze broke out! Right in front of Cook.

Percival and his men were like those guys from Chariots of Fire, running across the street, into the building, and ducking bullets right and left!
On the last attack, I drew a 12 Time Trigger for a morale check. Since that would mean the German exited units would come back onto the board, I had to give up Initiative to stop that from happening.
They were still fine.
At the end of all that, with the new Wire and Blaze, Sgt Pfeiffer in the south was effectively blocked from doing much of anything, with a wall of British units and Wire blocking his path, and unable to get support from Lauerbach at all.
Then a breeze came up, spreading the fire further between the two German buildings.
Isn’t that just Combat Commander?
It gets weirder. Percival was just about to move off the board, when Eric drew an Interrogation event, looking at my hand and forcing me to discard my one Move card.
Curses!
And me with only 7 cards left in my deck.
Bad luck for me.
German Fire then caused a Blaze directly in Cook’s hex!
Good luck for me!
But I still wasn’t getting Percival off the board before Biermann came back.

Things were starting to look hairy again, though at least my leader was better as far as melee would go.
Eric had to discard again, though, and I had another Hidden Unit!
I don’t think I’ve ever had 3 of those before.

Somehow the Germans had missed Lt. O’Malley hiding in the attic in Objective 4 when they swept the building!
Granted, he was hiding under a bunch of old blankets, but still.
Bad searching on their part.

Eric couldn’t have that, so Grein took advantage of me not having a Fire card to run up the road to see if he could take care of the British ingrate.
Percival took advantage of Grein leaving (though he didn’t have LOS to him anyway) to run down the road and off the map for 10 points.
The squad with the Molotov cocktail tried to stop Grein with a double Ambush melee, but sadly drew a 2 for a melee attack roll and died, even though the German squad was broken and played Light Wounds to still have a team available.
The broken team quickly recovered.
Grein then charged at O’Malley, wanting to take him out before another Time trigger happened and potentially ended the game.
O’Malley could smell Grein’s bad breath outside the door!
He then threw the Molotov into the building, breaking O’Malley (he’s afraid of fire, you know).
On subsequent fire, Eric drew a Walking Wounded event.
Unluckily, though, the German squad appeared behind German lines and was pretty useless.
The German deck ran out and after a couple passes of the Initiative, the game continued.
Desperate to kill O’Malley, Grein fired into the building. A big dice draw!
But a big dice draw for me too, big enough, anyway.
Eric passed the Initiative to me to reroll…and I drew even higher!
O’Malley was safe.

After the Time trigger, Percival and his men showed up in the Foxholes beside Objective 3.
Biermann decided to make his own run down the road, but ended up in a minefield on the road.
The mine attack…was a 12 Time trigger!
But after a couple passes of the Initiative, the game went on.
Biermann and his men broke, though, cowering in the booby trapped road.
O’Malley recovered, and Percival opened up on Grein from the foxholes, breaking both of them.
Grein recovered (after giving me the Initiative when he drew an 11) and then charged Percival, throwing some 7 smoke first.

It was going to be make or break time for the Germans.
But then he moved back. Eric was just using a Move card to try and get an Advance!
The British fire did end up causing more Wire/Rubble in Pfeiffer’s building.
He was never going to be moving now.
Finally, Eric had drawn an Advance.
Grein and his men stormed O’Malley’s building, and he didn’t have any Ambush cards!
The British now had a 9-VP advantage.
Some moving, some firing, me routing Biermann’s squad off of the board for 2 more points, and Lauerbach charging down the road to see if he could help Grein out, all of that happened.

Then Eric had to discard again…and I had another Hidden Unit!
That’s four now, if you’re keeping score.
Needless to say, this newly-found British squad appeared in Objective 3, essentially sealing the victory.
Now it was time to run out the clock.
The Germans only had 7 cards left in the deck, but drew a 12 on a Recover order anyway.
The game ended, with a German hidden objective giving Eric one more point.
A 16-point victory!
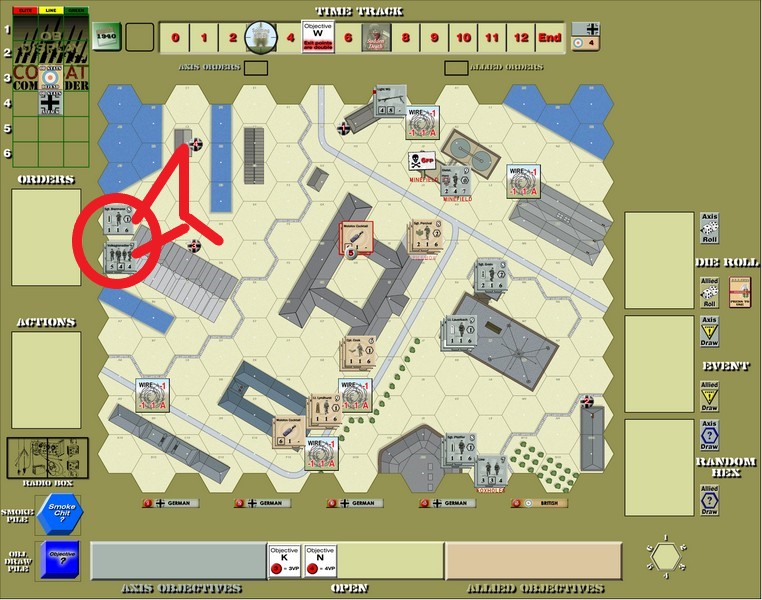
Here’s the final map.
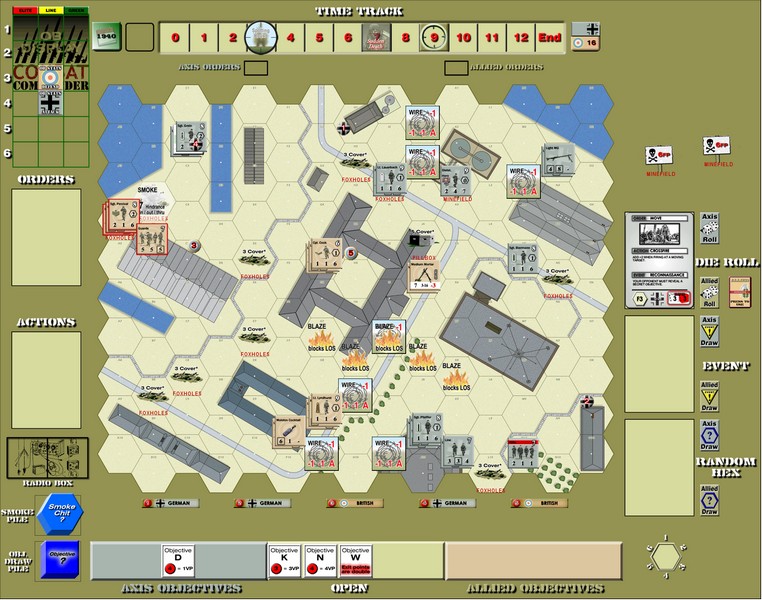
This was much closer than the score indicates, and the luck was back and forth on this one.
Granted, me having Hidden Unit cards so often kind of won the game for me, but some things went against me as well.
Nothing major like that, of course!
I thought I would have a hard time coming back when the Interrogation event had me discard Percival’s Move card just as I was about to exit him, meaning he had to stay on the board until Biermann had come back.
Thankfully I was able to scoot him off the board anyway.
Overall, the luck definitely favoured me, and to me that’s the beauty of Combat Commander. The chaos and “anything can happen” feeling. You never feel like you’re out of it.
Of course, I don’t know how Eric feels about that after this scenario.
The bombing raid snipers ended up not attacking anybody, though they did cause some inconvenient Wire for Eric.
I’m playing the May ladder game on May 18, so the write-up for that will come shortly after.
If you enjoyed this report, or the other ones I’ve written, why not join us on the ladder? You get to play with a great group of guys and you get to play Combat Commander at least once a month.
What could be better?
Combat Commander Ladder – After Action Reports
To see all of my Ladder After Action Reports since May 2021, go here!

That one was very interesting – and I love blaze!
LikeLiked by 1 person
The bombing raid sniper rule is very interesting too. Glad you enjoyed!
LikeLiked by 1 person