Dude! Take Your Turn!
A Gaming Life
Combat Commander – After Action Report – Scenario M10 – Bulolo River Bridge
Welcome to another tale of conflict and adventure from the Combat Commander ladder, where I get to play one of my favourite games monthly online with some wonderful people.
The ladder is run by the peerless Patrick Pence of Patrick’s Tactics & Tutorials fame.
Really, he is famous. Look him up.
The October scenarios are from the New Guinea battle pack for Combat Commander: Pacific and have the Japanese facing off against Commonwealth and US troops in 1942-44 in (wait for it)…New Guinea.
This month, my opponent was Ted S and I managed to land an opponent in my time zone!
Scenario M10, Bulolo River Bridge, has the Australians and Japanese both in Recon mode as they are attempting to cross the Bulolo River and get off the map edge for extra points.

(Don’t forget that you can click on a picture to blow it up)
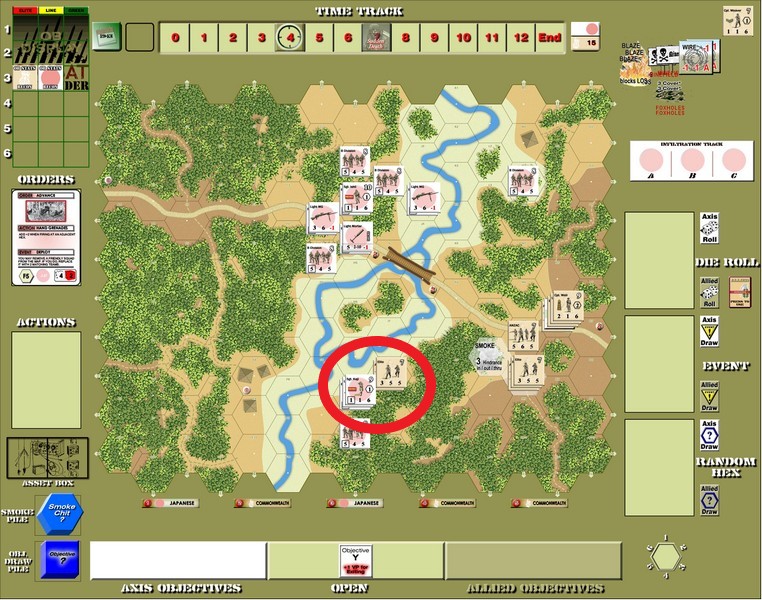
Both sides have to set up on the east side of the river. The Japanese (white, me) have to set up in a certain number of hexes on or along the road in the northeast.
The Allies (tan, Ted) can be positioned up to 3 hexes from the bottom of the map. The picture was taken after Ted’s first move, which is why three stacks are in the water. He did set up correctly.
This scenario is another one with a bunch of interesting special rules.
The stream on the map is a water barrier. This means that it costs all of your movement points to enter (so you have to be adjacent to it when you start). You have -2 Cover as well, if you happened to be fired on.
The Japanese can’t move anywhere but along the road until either a Japanese leader has line of sight to an Allied unit or until a unit is fired on.
Units exit off the west side of the map.
The Allies can only exit the map on the top four rows. The Japanese can only exit from the bottom four.
Most importantly are the two card rules.
The Allies can use Command Confusion cards (which are generally worthless cards, if you’re not familiar with the game) as Move cards.
The Japanese can use Charge cards (useless because the Japanese are not in Banzai mode) as “Dog Attacks.” These are done the same way as sniper checks. Choose a random hex and break an Allied unit that is in or adjacent to it.
Finally, getting off the board early gets you a bunch more points. That dwindles as time goes on.
Before I start the actual report, I have to say that I made a colossally stupid mistake in this game, which essentially could have cost me the game (you’ll have to keep reading to see if I did actually lose or not).
Experienced players reading this, especially other Ladder members, will recognize it very quickly (or they will at least wonder why I’m doing what I’m doing). They may have even already spotted it.
Ted started with the move I mentioned above, into the water.
I opened with a Dog Attack!
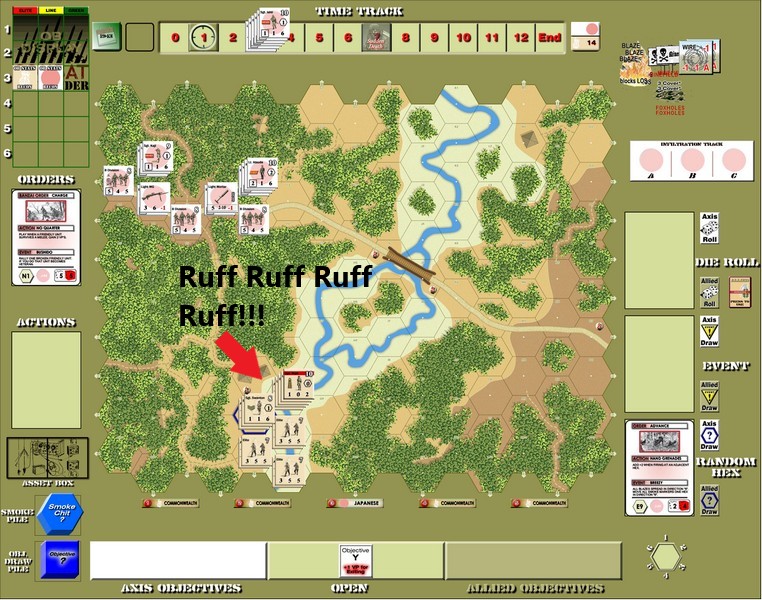
And poor Captain Weir paid the price.
I then started moving my guys forward to hopefully get into good position to fire on some Australians.

They got fired on, but nothing happened.
Ted quickly rallied Weir and broke my Medium Machine Gun, then finished crossing the river (though two units who had just entered the river broke under heavy Japanese fire (even without the MMG)
I moved Atsuda and the MMG into a better position to cover the bridge.
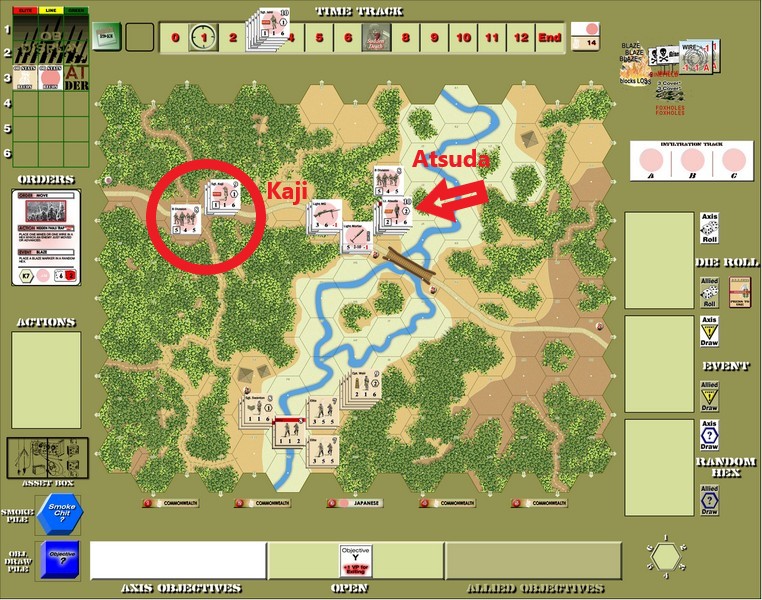
Along with that, I moved Sgt. Kaji and some men to perhaps get behind the Australians in the future.
The Australians who had already crossed the river, under Weir, kept moving along the slope while one broken team still languished in the water.

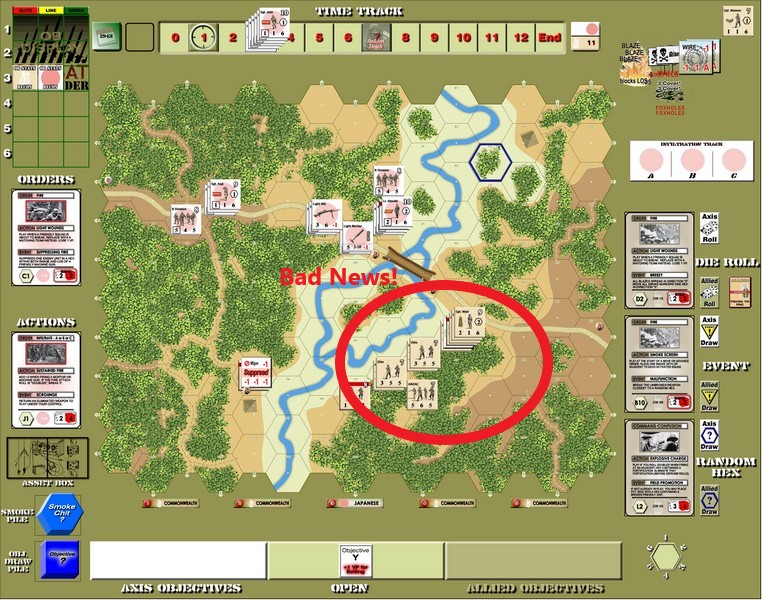
Sgt. Swanton and his men had moved up to also fire on the Japanese, but paid a heavy price for it (after Ted had broken my MMG again and I had fixed it again)
A second shot (pictured above) killed the squads and broke the suppressed Swanton.
Swanton quickly ducked back into the huts behind the jungle.
But that didn’t save him from Kaji coming down and eventually knifing him while he slept.
In the meantime, though, Weir and his men were still advancing and they were now in position to rain down heavy fire on the Japanese troops across the river.
The Japanese tried to stop them and did break everybody in Weir’s stack, but then a random Malfunction event broke the MMG again!
Another Dog Attack broke one of the Australian squads, but sadly not the vulnerable Weir (but it was close!)
Weir and his men started showering Atsuda and the MMG with fire, breaking the Japanese often, but they kept reviving.
Not enough to actually do anything, but they stood their ground for a while (though the squad did die, unfortunately).
Then Atsuda died, but the crew was still alive! Broken, but alive.
Weir did get hit by another Japanese sniper (dogs, snipers…he seems to attract danger!) but he quickly rallied.

Two quick deck depletions brought the Japanese reinforcements onto the board.
Which was good, because the Japanese were down a leader.
I ended up bringing the leader and most of his men down to where the action was. In hindsight, I probably should have had them run across the river before Weir and his men could get to the second level heights.
Oops.
Not the colossal mistake I mentioned, though. (you probably already know what it is, don’t you?)

I did send one squad across the river, though, to see if I could inhibit exiting.
That would add some excitement later.
Weir and company got onto the 2nd level heights finally while my lone squad crossed the river and got into position.
This was looking deadly.
Finally, Weir was able to fire at the MMG crew twice without me having a Revive card (or a Bushido event, which rallied them last time), and they died.
Belatedly, I realized that I could have been firing the mortar at Weir, trying to get smoke up there.
So Ted started playing Asset Denied cards on it instead!

Kaji and company tried to cross the river, but Weir laid down heavy fire and broke them, suppressing Kaji.
Thankfully I had drawn a Revive card so they were all fine and Advanced out of the water.
There was some movement with Weir getting into better position and then Kaji advanced up close and personal to a couple of Australian units.
The squad got out of Dodge, leaving the team to its fate. Though it did also run away.
They couldn’t run far.
The mortar team broke, revived, and laid more smoke.
Sadly, the smoke shells must have gotten wet or something, because with three successful mortar attacks, the best smoke I could get was 5 hindrance.
Ted spent some time reorganizing his massive fire group.

And Kaji finally tracked down the lowly Australian team.
They died.
Ted did make a mistake that ended up not costing him, though.
In moving the Australian fire group around, he had massively overstacked Weir’s hex.
Even my piddly firepower managed to break everybody in the stack (though it did cost him the Initiative)
Sadly, I couldn’t take advantage of it before he could rally them (which is after the below picture)
But he had moved them next to my blocking squad.
Things could get interesting!
Kaji tried to get up onto the 2nd level mountain but was blasted by Weir through the smoke.
A bunch of ineffective firing happened (and Kaji moved out of harm’s way).
And then the big event.

The lone squad…with three Ambushes, jumped into Weir’s hex. (I was hoping to draw another Ambush on my end of turn draw, but it didn’t happen).
I knew I had to do something desperate if I was going to pull this game out. Ted was only 5 losses away from Surrender and there were 3 units in the hex.
And I caught him with no Ambushes!
The team died, Weir broke.
It was an even 6-6 strength melee.
And I promptly drew a 5.
I gave the Initiative back for another roll.
Surely I could beat a 5!
Nope. I drew a 4.
Still, Ted could draw really low!
He drew a 3!
After giving me the Initiative back, though, he drew a 7.
I gave it back to him!
He drew a 6 and won the melee.
Nothing much else happened the rest of the game. We went through two Time advances and the game ended on Time 8 due to Sudden Death.
I succeeded in breaking some units sometimes, but Ted quickly revived them, and vice versa.
Ted had won with 16 points.
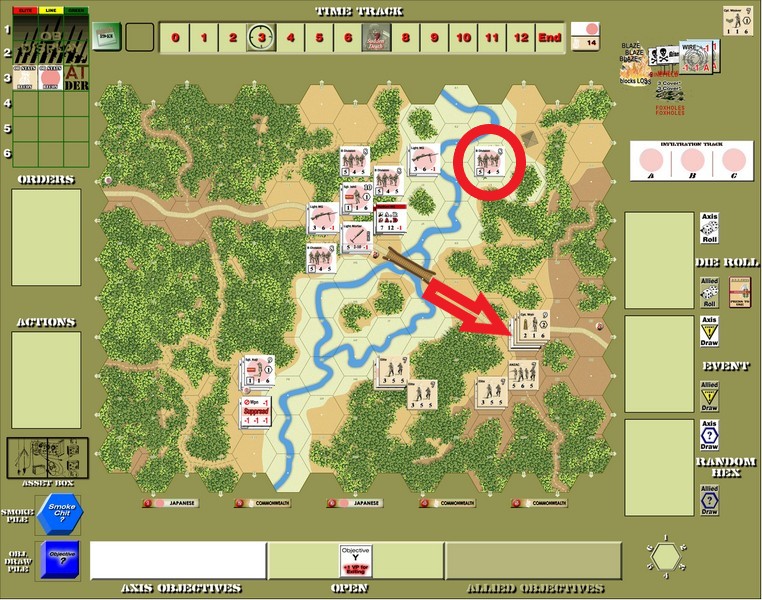
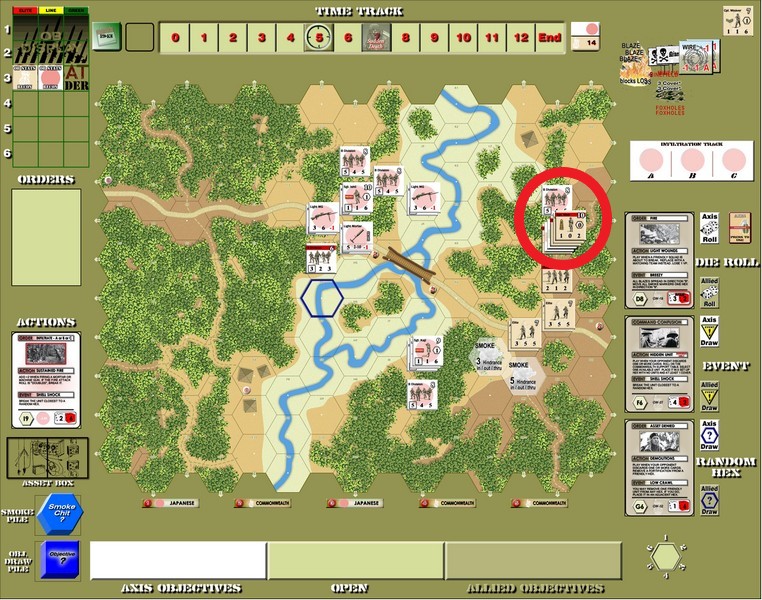
Here’s the final map.

How about I tell you about my colossal mistake now.
Veterans have probably already realized it.
See the red circle on that picture? The different colours of brown?
That is Level 2 (on the left) and Level 1 (on the right) hills.
What I should have done is put the MMG and Atsuda, along with a couple of squads, onto that crest and just rained fire down on the Australians like Ted did to me!
But for some reason, I missed that they were different levels.
I thought it was all Level 1, so I couldn’t see anything by remaining there.
The Japanese can win this scenario quite often by setting up a fire group there.
And I didn’t do it.
Still, I almost did pull it out. If that melee had gone my way with Weir, or if I could have laid some half-way decent smoke to inhibit the fire group, I might have still won.
But I didn’t.
Ted played a great game, and I can just imagine his great feeling when he realized he wasn’t going to be facing that Japanese fire group.
I hope to play Ted again some time as he was a gracious and skilled opponent.
The loss puts me at 15-14 in my time on the ladder. Nice to see my loss prediction last month was true.
In November, we play a scenario from the Stalingrad map pack.
That will be interesting. I have played a couple of them, but none that use a lot of the special rules from the pack.
Should be fun!
Why not join us on the ladder so you can play some of this with me (or some others, but mainly me)?
See you next month!
Combat Commander Ladder – After Action Reports
To see all of my Ladder After Action Reports since May 2021, go here!

Brutal game in brutal terrain. I remember this map very well from one of our games 🙂
LikeLike
I also was remiss in seeing the difference in the terrain level so did not set up a fire group or the smoke mortar. Big mistake. Some day I will learn how to play this game….. Vaxman
LikeLiked by 1 person
I’m not alone!!!! That makes me so happy.
LikeLike
Yes, it was almost over, in the Japanese favor, late in Turn One with Sgt Swanton destroyed and Cpt Weir broken… A random event “Malfunction” happening to affect the MMG, just as the Japanese were about to lay the coup de grace… I don’t remember what you rolled, but it reduced your attack from a 10+ to a 6+…
LikeLiked by 1 person
Yeah, that was a pivotal moment that I had forgotten about!
LikeLike
What a tenacious offensive! A pity the last melee did not work out for you!
LikeLiked by 1 person
Yeah, it was pretty harsh. But I almost prevailed!
LikeLiked by 1 person
Pingback: Combat Commander – After Action Report – Scenario L – Slopes of Hell – Dude! Take Your Turn!
Pingback: Combat Commander After Action Report – Scenario #33 – We Go! – Dude! Take Your Turn!
Pingback: Combat Commander After Action Report – Scenario #20 – A March in December – Dude! Take Your Turn!
Pingback: Combat Commander After Action Report Supplemental No. 2 – Scenario #92 – Let England Shake – Dude! Take Your Turn!
Pingback: Combat Commander After Action Report – Scenario #10 – Commando School – Dude! Take Your Turn!
Pingback: Combat Commander After Action Report Supplemental – Scenario #28 – No Ingouf Around – Dude! Take Your Turn!
Pingback: Combat Commander After Action Report – Scenario #105 – La Fiere Counterattack – Dude! Take Your Turn!
Pingback: Combat Commander After Action Report – Scenario LoM #8 – Codes in the Sunrise – Dude! Take Your Turn!
Pingback: Combat Commander After Action Report – Scenario #82 – Hidden Guns Lash Out – Dude! Take Your Turn!
Pingback: Combat Commander After Action Report – Scenario #67 – The Orient Express – Dude! Take Your Turn!
Pingback: October 2023 Gaming – Dude! Take Your Turn!
Pingback: Combat Commander – After Action Report – Scenario 44 – Stalingrad of the North – Dude! Take Your Turn!