Dude! Take Your Turn!
A Gaming Life
Combat Commander – After Action Report – Scenario G – Bitter Creek
One of the really cool things about the monthly Combat Commander ladder is meeting new opponents and then trying to wipe the floor with them.
The latter part doesn’t happen very often, unfortunately.
While Combat Commander: Europe is my favourite, I do enjoy (and it’s the only one I actually own) Combat Commander: Pacific.
In the lead-in to the Autumn, the ladder scenarios move from Europe to Pacific, which means we have to remember all of the rules changes from what we’ve been using for the last 10 months.
Hence it’s really cool that we had Rules Guru Noel spectating our match this month!
Let me start at the beginning, though.
The Combat Commander ladder is a monthly tournament administered by the Champion-caliber Patrick Pence, he of Patrick’s Tactics & Tutorials Youtube fame.
This is the tournament where we play a monthly game against various opponents as we try to reach the top! Like Patrick has.
Curse him…
But anyway…
The September and October scenarios are from Combat Commander: Pacific and the New Guinea battle pack.
September is from the base game.
This month, I was matched up against Steve C (not the same Steve C from my very first ever game, but a different one), and I was actually able to choose the side I wanted to play!
This month’s scenario is Bitter Creek, where the attacking Australian forces are trying to pin down the defending Japanese forces on New Guinea, breaking through to exit off the map edge.
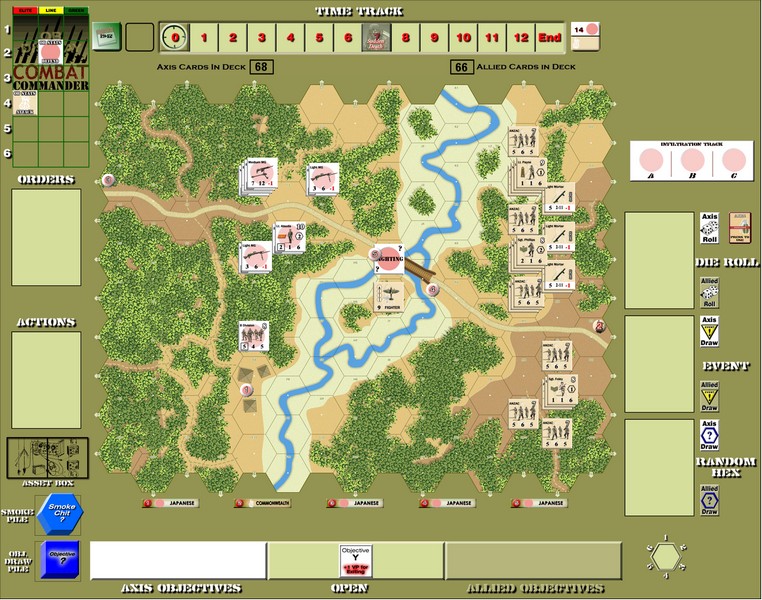
(Don’t forget that you can click on a picture to blow it up)
I was the Australians (I actually chose them! I am so dumb…)
Steve was the Japanese defenders.
They don’t have a lot of units, so Steve decided to sit back and wait for me to come to him.
This meant I didn’t have a lot of targets initially.
There are a few special rules to talk about before we go into the scenario itself.
The bridge hexes (where the Japanese Sighting marker is) represent a small footbridge, meaning the movement cost for each bridge hex is 3 instead of 1 (even crossing a road hexside).
The stream that runs across the board is fordable, but any unit that Moves into it (not Advances, which is important) becomes Suppressed immediately. If they’re already Suppressed, then they break.
The Australians, if they are on the left side of the creek, get +1 movement point when moving. Sadly, I forgot that rule, but I don’t think it made much of a difference.
Finally, the Australian plane will come back after each Time trigger, even if it was used, appearing on the Japanese Sighting marker.
Which also means that, if the Japanese infiltrate a new unit and remove the Sighting marker, that doesn’t happen anymore.
Units exiting the map get +1 VP, making the Australian plan pretty obvious. Try to get off the board!
Let’s see what happened.
The Australians have a bunch of mortars that can fire smoke, and I lined them up on the heights overlooking the creek.
Therefore, my first order was to fire them all and try to blanket the main Japanese weapon defending, the Medium Machine Gun and the Infantry Gun.
I didn’t do a great job of it on the first round, but my guys in the south started advancing.

There’s a lot of jungle down there, which made things slow.
Steve then tried to blindly gain a radio with an Asset Request, but it didn’t work.
I did manage to land some -8 smoke on the main Japanese position, plus getting some smoke in front of it too.
You have to do that in Pacific, because “Disperse” triggers are pretty common, meaning one smoke goes away.
You have to have excess smoke to get rid of when that happens!
Some ineffective fire both ways, and then an Australian attack brought in some reinforcements, and then a Japanese attack caused more Australian reinforcements!
I brought out a Heavy Machine Gun to also put onto the heights overlooking everything and then a leader to enable everybody on the heights to fire.
The thing about this map, though, is that with all the jungle, there are tons of blind hexes where I can’t shoot.
So height doesn’t always get you good things.
Steve did end up infiltrating a new leader (the Japanese only have one leader in this scenario), so I knew the Sighting marker would not be lasting long.
After some more jockeying, I decided to Advance my guys in the north into the creek and then move my guys in the south.

Some veterans will already see a flaw in my strategy.
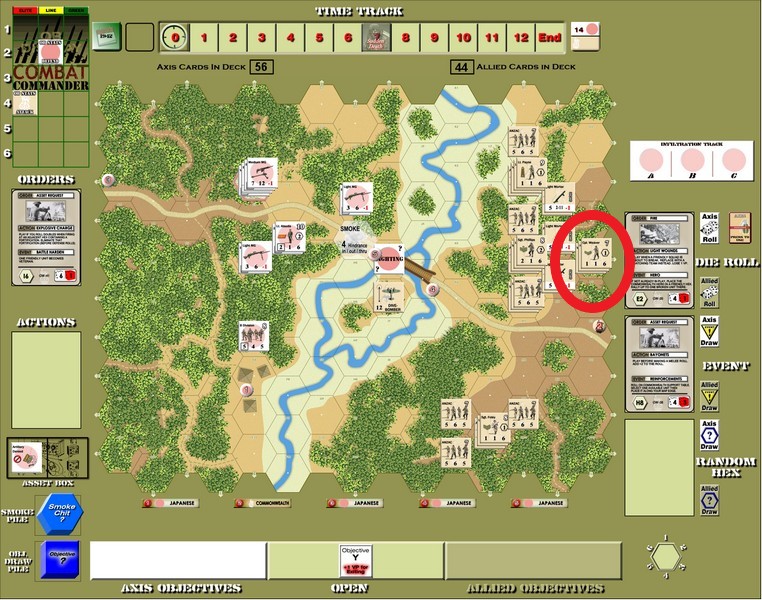
Steve fixed his Battalion Gun that I had broken earlier, and moved some of his guys to get into better position.
Hey, a target for the Australians!
The Australian MMG opened fire on them, but a Disperse event caused the smoke on the Japanese position to dissipate. The Japanese squad did break, though.
So it was time for the mortars to go to work again!
Sadly, the first attack caused a Time trigger! And a miss, of course.
The second and third shots missed too.
The mortars were very hit and miss in this scenario.
I did fire on the broken squad, but Steve had a Hidden Cave, really adding to the squad’s defense value.
With the smoke gone, I luckily had two Asset Denied orders, meaning I could break and destroy the Japanese MMG!
I guess they brought defective bullets to the battle and it blew up on them.
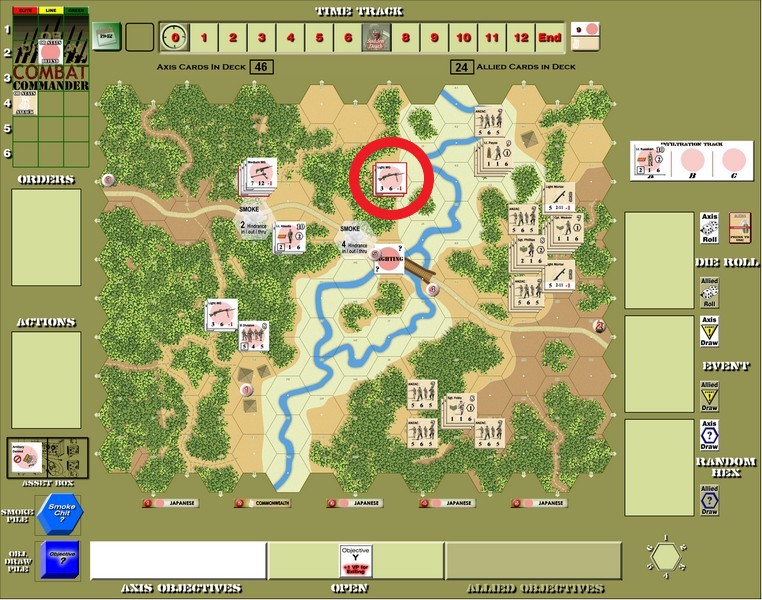
The mortars then managed to land some more -8 smoke on the main Japanese position.
Here’s the disposition after a few turns of that.

Smoke in the south and the Australian north advanced another hex.
The Australian south moved a bit more and I finally drew an Asset Request to use my dive bomber!

Even though it missed the Japanese position totally, the attack drew an Australian sniper that killed the broken Japanese unit.
2 points for me!
I also took advantage of the smoke and extra leader to move my guys in the centre forward!

Again, veteran players can probably see the flaws here. Patrick and Noel can’t comment, though, since we talked about it after the game.
(they can comment, but not provide the answer!)
Steve fired on the guys in the stream, and not only did some of them break, but another Time advance happened!
A Japanese sniper also broke Weaver, who was coordinating the mortars.
Unfortunately, the sniper made the Sighting marker go all the way to my board edge, meaning my fighter appeared far away from all the action.
I then started moving my center and north guys forward.

Dare I say again that veteran players may see the problem with all of this?
Steve brought his leader onto the board, meaning there was no more Sighting marker for my plane to appear on once I used it.
Not good considering how far away it was from the action.
Steve moved into the Cave with a Japanese team and then I advanced into the hex for melee.
Of course, part of Pacific is that melee doesn’t happen until the beginning of the Allied turn, meaning that he could move out of it.
And he did.
An Australian attack made the smoke on the Japanese main position go away. But that made it easier for me to attack it with a huge attack!
Sadly, Steve had a Pillbox ready to drop on his units, meaning they had a huge defense and didn’t come close to breaking.
I did manage to smoke it again with a -7, though!
I may not have played very well, but I did manage to use smoke very effectively.
I also was able to move forward in the south and the centre.

See the problem with this?
I kept firing at the Japanese team that advanced out of melee, but I couldn’t kill it before Steve revived it.
Which was really annoying.
I then kept moving in the centre…and ran into a minefield on the other side of the bridge!

That was also really annoying.
That panicked everybody, but thankfully I had a Revive card ready and rallied them all.
But Time advanced twice in that sequence!
We were half-way to Sudden Death and I wasn’t anywhere near the other side of the board.
The smoke on the Japanese gun also dispersed, but my mortars managed to get another heavy smoke on it.
The smoke quickly dissipated, though.
Which meant I needed to do more of it!
Sadly, firing at the Japanese team caused another Time trigger.
Time was getting away from me.
I finally decided to use the plane since it wasn’t going to move, and of course it missed.
How about a status update?
Yeah, I wasn’t in a great position.

A lack of Move/Advance cards kept me paralyzed at this point.
I finally drew a card that let me move off the minefield. The minefield caused another Time trigger!
But I was close to the Japanese and in prime position to get into melee, if I had some Ambush cards.

Fire and mines caused some breaking, but thankfully I had a Revive card.
The minefield did mean that my other units scurried off the side of the bridge, which was really annoying.
I also moved up north to see if I could skirt the Japanese forces with Payne and company.

Anybody see the problem with all of this?
I was close-up to a few Japanese units, but sadly every time I fired at them, Steve had a Revive card.
I couldn’t take advantage of my superior firepower.
And my Move cards were intermittent.
Steve thought it was best to get out of the way of this huge Australian force, and I couldn’t do anything to stop them due to all the blind hexes.
It would make it easier for me to move, though…if I could draw the cards.
I kept moving forward, both in the centre and the south.

See the problem with that?
I did manage to Asset Denied the Battalion Gun, destroying it.
Yay for me!
I also advanced onto the team that was manning the gun, and destroyed them utterly.
Steve didn’t seem to care about them, since he wanted to move Atsuda and his men onto the main Australian exit point.
He did Ambush me to break my team and squad, but I still overpowered him.
It was one round away from Sudden Death, and even with that successful melee, I was down 14 points.
I was planning on doing a massive attack on Atsuda, if I could do it in time.

Would it work?
We were quite close to Sudden Death, though we would have to roll a 6 or less for the game to end.
And I had no Move cards again!
I had four Fire cards, though.
Steve attacked with his lone team, and drew a Time trigger, so it may not matter anyway.
And it didn’t.
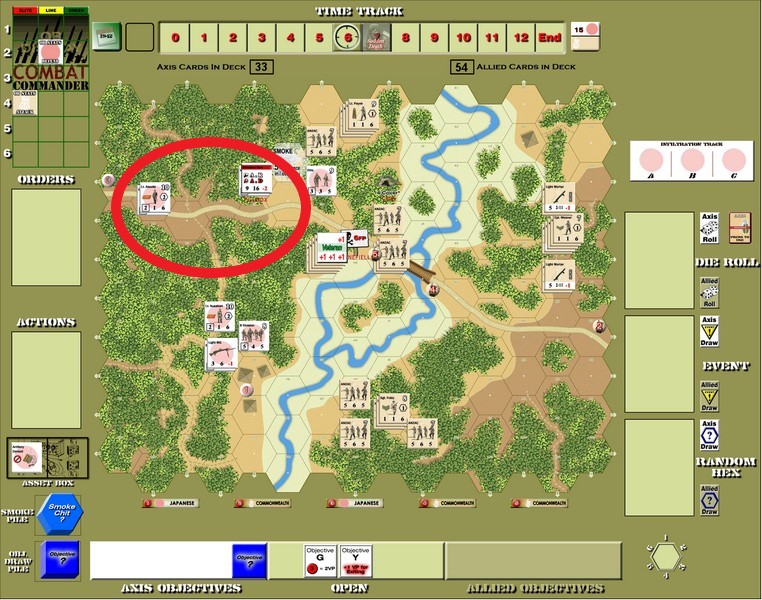
The Initiative passed back and forth a few times, but finally a 4 was drawn, ending the game.
If I had been able to get the game to go one more round, with 43 cards left in my deck, I might have been able to do something.
The secret objective that Steve had drawn ended up giving me one more point, resulting in a 13-point Japanese victory.
Here’s the final map (with objective).

The four of us (Steve, Patrick, Noel and myself) discussed things afterwards and yes, I was way too tentative in advancing, consider the number of Revive cards I had and the lackluster firepower the Japanese had (not to mention all the smoke).
As hinted at many times above, I also shouldn’t have advanced on such a broad front. Maybe the north and centre, but not the south too.
It was great to have Patrick and Noel stick around and watch almost the whole match.
Spectators are cool!
Especially when playing Pacific when you have Noel to correct you when you’re trying to use Europe rules for Pacific.
Steve was also a great opponent. Very fun to play against, friendly, and also pretty good.
When I played this scenario with Michal and was the Japanese, I had a forward defense rather than holding back and making the Australians search for targets.
It did not end well (which was why I picked the Australians).
This loss leaves me at 21-19 in my ladder career, and on a 3-game losing streak!
I’ll never get to play Patrick again at this rate. Especially since he is still on the top of the hill, having fended off his first challenger!
Next month’s scenario is from the New Guinea battle pack, where I haven’t played any of the scenarios yet (other than previous ladder ones).
So I’m not sure what I’m in for.
Other than more Pacific goodness.
If this interested you at all (and I hope it did!), why not join us on the ladder?
We’re a great group of guys (and Kai as well! Really happy to have Kai on the ladder and I hope to play her some day, with the added bonus that we’re in the same time zone) and always willing to play a pickup game if you want one.
Until next month, my advice to you is move move move! Especially when attacking.
See you next month!
Combat Commander Ladder – After Action Reports
To see all of my Ladder After Action Reports since May 2021, go here!

Brutal scenario and brutal game! Good luck in future games!
LikeLiked by 1 person
Yeah, setting up like you did doesn’t work if the Japanese hide! 🙂
LikeLiked by 1 person