Dude! Take Your Turn!
A Gaming Life
Combat Commander After Action Report – Scenario #33 – We Go!

(Edit: 8/3023) – The video is live!!!
(The exclamation mark is in the scenario title, not meaning that I’m very excited about this scenario…though actually it is quite good!)
Two After Action Reports in quick succession, which can happen when one is really late and I’m on top of the other one!
That, of course, could be because I was playing…da Boss.
Oh, let’s start at the beginning.
This is another adventure in the Combat Commander ladder, where I get to play one of my favourite games at least once a month, online with a bunch of awesome people.
Run by da Boss…I mean the competitive Patrick Pence (he of Patrick’s Tactics & Tutorials fame), the ladder is a monthly game of Combat Commander using all of the various expansions and the Pacific version of the game.
The August scenario is from the Paratrooper battle pack and has some American paratroopers landing behind the lines in Normandy on June 6, 1944.
Yes, Patrick and I faced off last Friday night for what would be a barnburner of a scenario (am I being facetious? I’ll let you make the call).
This was a battle to see whose luck would be worse.
I’ll embed the video from Patrick’s channel when he posts it.

I will be!
(Don’t forget that you can click on a picture to blow it up…I mean expand it)
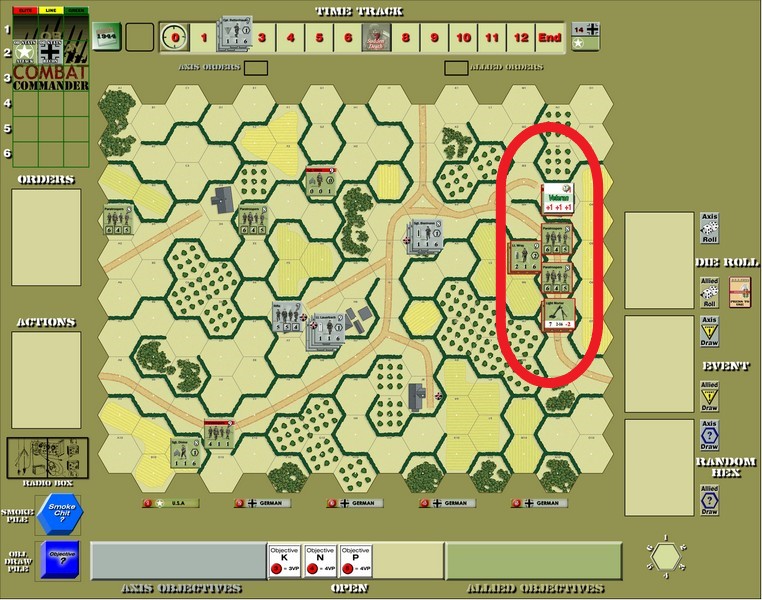
The Germans (me, grey) have a small number of units in the village. The Americans (Patrick, green) land with each unit drawing a random hex.

A few special rules before I show you the American landing.
If they land in line of sight and range of a German unit or gun, they land broken.
The mortar then gets placed (probably not on a broken unit).
They can easily scatter and if the landing is bad and they don’t get a Recover card, it can be disastrous!
First, there are no points for exiting. Everybody stays on the board, dies, or if they move off the board they give the other player points (by dying, I presume).
Hedges (the green lines along hexsides) are bocage instead of hedges. They get +2 movement and cover rather than the normal +1.
The Germans have a couple of reinforcements during Time 2, mainly a leader, a squad and a light machine gun. The fun thing is that they can set up on any board edge, not just the German side.
That flexibility is great for the Germans.
The Americans only have 2 Orders on their turn until Time 3, when it increases to 3 Orders.
And finally, most annoyingly, during all of Time 0, the German Move cards are actually “Command Confusion” (useless) cards. The Germans can Advance, but they can’t Move.
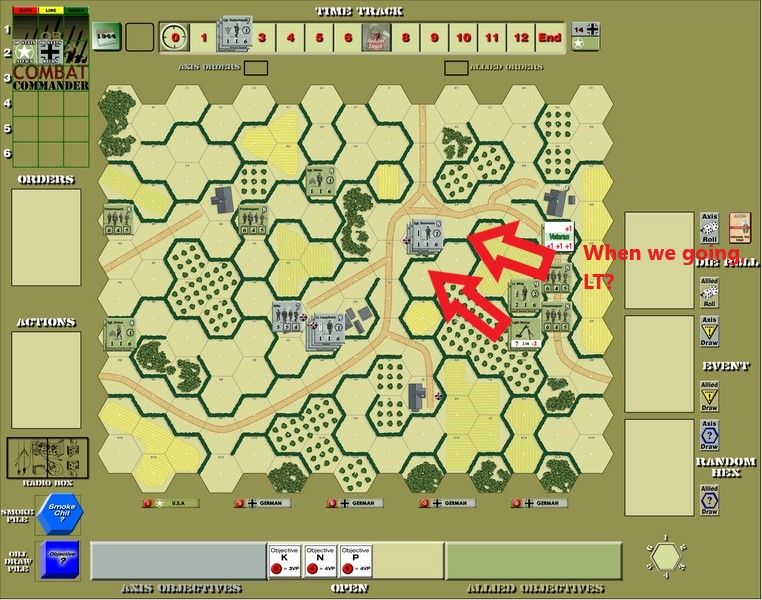
Now let’s see how the American landings went.

Not too bad, but Patrick didn’t have a Recover card at the start!
He did, however, have a Move and an Advance card to get one squad and the broken leader out of danger.
I fired at the remaining one (up in the northeast of the map) and not only didn’t do any damage, but made him a Veteran!
Patrick quickly consolidated everybody in the east, including getting that broken squad out of harm’s way (and in better terrain to recover).
Next turn, everybody recovered.
No cheap German points!
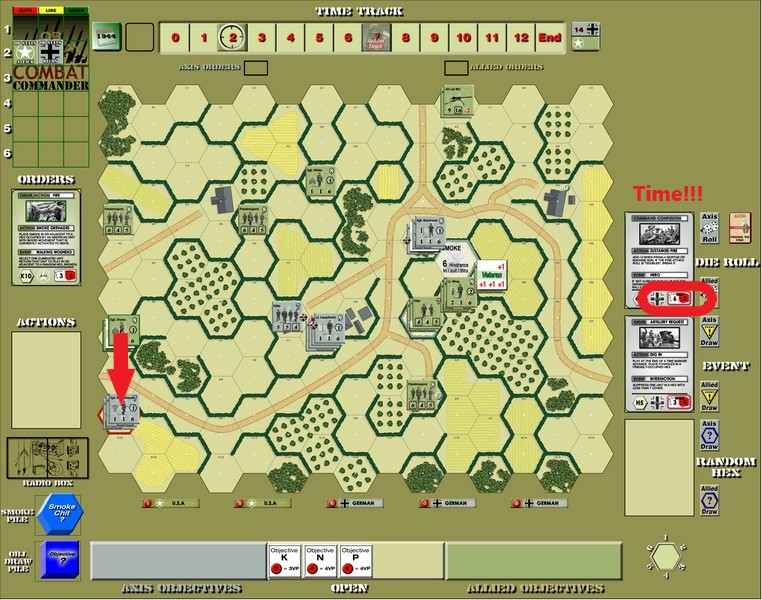
Patrick then started to move the guys in the southwest corner to form up with the other ones in the northwest. The squad moved down the road, within sight of a German squad in the village (but behind bocage, so probably safe).
In what would be their only shot fired in anger this game, they drew a 12 Time trigger!
Patrick couldn’t have that this early, so he gave me the Initiative and the squad survived with a bad second German roll.
Then began the most riveting 10 minutes of Combat Commander I’ve ever played.

Yep, I’m hoping Patrick keeps this in the video because I guarantee that will bring viewers to his channel.
Ten minutes of both of us discarding!
(Ok, maybe it just felt like 10 minutes).
Patrick was looking for cards to begin his assault on the right.
The Germans literally have nothing to do if they can’t see anybody.
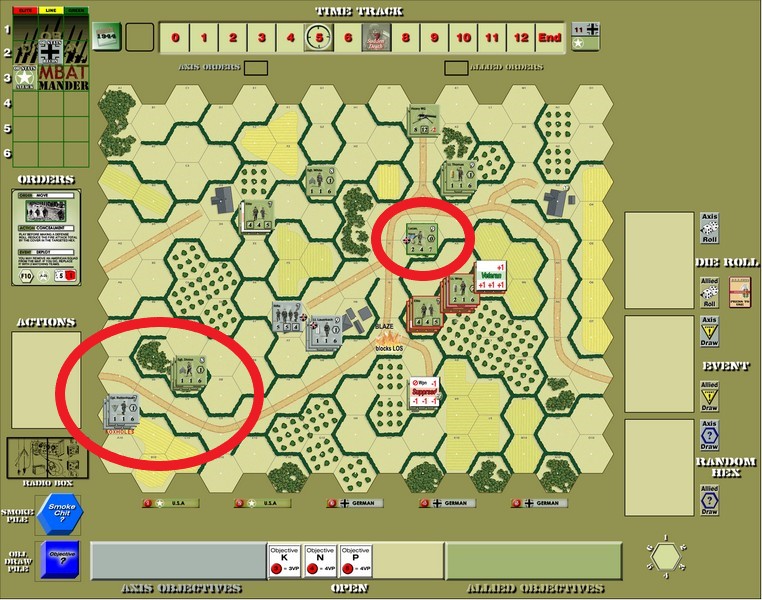
Finally the Americans jumped over the bocage, laying smoke grenades right and left to prevent the Germans from firing (of course, I only had a light machine gun in that objective, not the heavy machine gun that started in the village and never had anybody in LOS).
On the subsequent German Opportunity Fire (the smoke was good, but not too good that I couldn’t at least make Patrick draw cards), he drew a Malfunction event where the nearest weapon to a random hex would malfunction.
The Americans only have the mortar, so it was likely to be mine.
And it was the HMG!
Next turn (after a German discard), the Americans moved closer.
More German fire…and another Time trigger, this time American! (at least they passed the morale check)
This time Patrick couldn’t stop it.
One of the smokes went away and the Germans could now move!
Not that they were going to.

The Americans threw more smoke, getting ready to assault the forest. More German fire…and another US Time trigger!
The German reinforcements came onto the map in the southwest to try and hinder Sgt. Devine and company.
On his subsequent morale check (there were three units there), Patrick drew the first of 4 (!) Reinforcement events he received.
I don’t think I’ve ever seen that many Reinforcement events in one game in my life.
A 50 cal machine gun and crew appeared in the north.
Some more ineffective fire from the main battle point (which resulted only in a German unit becoming Veteran) and then Devine decided he needed to take care of Rettenhaus in the southwest.
A German morale check resulted in…you guessed it. A Time trigger!
The Americans finally opened fire on the Woods, breaking both German units there.

Let me explain the situation at this point.
I have a 5 card hand (Recon posture).
I had been discarding 1 card and saving 4 Ambush cards because I was expecting the attack through all that smoke and the Paratroopers are elite melee units.
Patrick knew something was up, though, because there’s no other reason to hold onto 4 cards when you’re not doing anything.
Thankfully, at this discard turn, I actually had a Recover as my 5th card!
Anyway, my Recover rallied the squad, bringing out the German Hero Dietel!
Dietel himself rallied the German leader, Biermann.
In typical Patrick luck, firing on Rettenhaus again broke a German unit, but then Rettenhaus’ morale check brought a Medic event, rallying the broken squad!
Though Rettenhaus himself was broken.
Thankfully since I was still only discarding 1 card and couldn’t draw another Recover, both of Patrick’s attempts to Rout Rettenhaus off the board failed.
But one of them did produce Patrick’s second Reinforcements event!
Now the new 50 cal MG had a shiny new leader to go with them and lead them.
Back and forth fire between Biermann and Lt. Wray’s men didn’t do much.
I did keep drawing a 5th non-Ambush Fire card so I could keep poking at Wray, though!
Of course, such fire eventually led Wray’s men to scrounge my eliminated HMG.
Whoops!
Wray panicked, but here came Patrick’s third Reinforcement event!
A weapons team and a mortar appeared on the board.

I just shook my head.
Patrick tried to move the mortar across the road, but Biermann said “get that lame shit out of here…” and broke them in the road.
(I did have to use one of my Ambush Fire cards, but at this point I figured I couldn’t keep holding on to them. Wray didn’t appear to be going anywhere until my guys were gone for good)
Meanwhile, Thomas and the 50 cal moved into the orchard across from Biermann.
This did not look good.
Of course Patrick had a Recover card. Everybody recovered but the mortar team!
Thankfully, my non-Ambush card turned out to be a Rout…and the mortar team left the board!
One point for the Germans and the first full casualty of the battle.
Wray and his men did send withering HMG fire into Biermann’s hex, breaking everybody but Biermann. And I didn’t have a Recover card.
Another fire caused me to give up Initiative, though it didn’t do any good.
The heroic squad, along with the actual Hero himself, perished. Biermann finally broke.

He was occupying the Woods by himself.
I did still have 2 Ambush cards, though.
The situation at this time: the Germans had 13 VP. Capturing Objective 5 (Biermann’s hex) would give the Americans 8 points.
We were not quite half-way through the game as far as Sudden Death goes.
Patrick fired the mortar (the original one) to try and finish Biermann off…and drew a Time trigger!
He wanted that mortar shot, so he took the Time.
However, the firepower of the mortar sucked (maybe a dud shell?) and Biermann survived.

Patrick decided to try and take care of Rettenhaus (since I still hadn’t drawn a Recover card, though they were now in foxholes) and moved south. He also started to try and set up a move toward the central buildings.
Some more discarding ensued…and then hallelujah! I drew a Recover card.
Rettenhaus’ stack along with Biermann himself were back in action.
Wray continued raining fire on Biermann (he just kept moving from tree to tree in that hex, I guess), but a German sniper broke Sgt. White! (he hadn’t done anything all game anyway)
Biermann broke and the rest of the Americans fired…and another Time trigger!

Some well-placed Concealment and drawing a 10 kept Biermann alive, much to Patrick’s chagrin.
Devine fired on Rettenhaus again…and drew Patrick’s fourth Reinforcements event!
An American HMG appeared on the road north of Biermann.
Things just kept getting worse for him.
But he soldiered on!
Some American movement in the southwest resulted in German fire, and the American Hero Lucas emerged to rally Sgt. White!
“It’s a good thing you arrived, Lucas. I was feeling really scared there for a moment.”
Finally, the mortar took out Biermann.
Let’s stop a moment and honour his courage.

Things were looking bleak now. Two time triggers away from Sudden Death and the Germans, while still being 4 losses away from Surrender (the most common way for the Germans to lose this scenario so far this month), faced the realization that the Americans capturing the objective would bring the VP swing perilously close to the American side.
And the Germans didn’t have much in the village to stop the overwhelming American force (their only loss was a reinforcement anyway!)
Lucas quickly ran across the road to take the objective, showing what Heroes do. It was now a 3-point German lead.
Meanwhile, Devine and Rettenhaus were facing off in the southwest.
And I had no more Fire cards!
Devine fired on Rettenhaus, and the German morale checks resulted in the German deck running out…the only time that happened in this game!
One Time from Sudden Death.
Could I hold on?
I knew that I couldn’t if Sudden Death didn’t actually happen.

Thomas and the 50 cal moved into position to rain holy hellfire on the Germans in the buildings down the road.
I finally drew some Fire cards and fired at Devine with Rettenhaus.
I sustained the fire, adding +2 to the attack but risking the LMG. And sure enough, it broke!
But the Sniper trigger that was also drawn ended up fixing it.
I did manage to break Devine, though!
Then the 50 cal let loose…the poor German squad.
Patrick sustained it twice, for +4 firepower.
He didn’t break it (that would have been typical Patrick luck). The German squad panicked.
But I had a Recover card!
Only needed a 10 to rally them.
And promptly drew a 12 Time trigger (which was typical Patrick luck).
He could have given me Initiative to have me reroll it, but he didn’t.
First German Sudden Death draw was a 5 (needed 6 or less to end the game).
Patrick handed over Initiative.
Second Sudden Death draw…was also a 5!
Game over, and the Germans had hung on by the skin of their teeth.
Here’s the final situation.

The Germans win with 3 VP!
Wow, what a game (except for Discardpalooza, of course…that was…not what a game).
It was so much fun playing Patrick after having him stop by and chat during some of my previous games. After 2 years, we finally were across the (virtual) table from each other.
And it was worth the wait.
It would be redundant to say what a great guy Patrick is like I usually do about my opponents on the ladder (since I do that every month anyway!), so I’ll just thank him once again for creating and running this ladder.
It has been an amazing experience.
I look forward to watching the video to see how Patrick edits it and makes us both look good.
This win puts me at 14-13 on the ladder. I so far have been able to avoid being under .500.
Let’s hope that continues! We have two Pacific scenarios coming up in the next two months, and I lost both of them badly last year.
If you liked this, though, or just want to get some live Combat Commander in your day, how about joining us on the ladder?
It’s been so great and then, who knows? You might face me across the table soon.
Combat Commander Ladder – After Action Reports
To see all of my Ladder After Action Reports since May 2021, go here!

Pingback: Combat Commander After Action Report – Scenario #20 – A March in December – Dude! Take Your Turn!
Pingback: Combat Commander After Action Report Supplemental No. 2 – Scenario #92 – Let England Shake – Dude! Take Your Turn!
Pingback: Combat Commander After Action Report – Scenario #10 – Commando School – Dude! Take Your Turn!
Pingback: Combat Commander After Action Report Supplemental – Scenario #28 – No Ingouf Around – Dude! Take Your Turn!
Pingback: Combat Commander After Action Report – Scenario #105 – La Fiere Counterattack – Dude! Take Your Turn!
Pingback: Combat Commander After Action Report – Scenario LoM #8 – Codes in the Sunrise – Dude! Take Your Turn!
Pingback: Combat Commander After Action Report – Scenario #91 – The Battle of Trafalgar – Dude! Take Your Turn!
Pingback: Combat Commander After Action Report – Scenario #82 – Hidden Guns Lash Out – Dude! Take Your Turn!
Pingback: Combat Commander After Action Report – Scenario #67 – The Orient Express – Dude! Take Your Turn!
Pingback: Combat Commander After Action Report – Scenario #53 – Deeds Not Words – Dude! Take Your Turn!
Pingback: Combat Commander – After Action Report – Scenario #41 – The Commissar House – Dude! Take Your Turn!
Pingback: Combat Commander – After Action Report – Scenario M4 – Templeton’s Crossing – Dude! Take Your Turn!
Pingback: Combat Commander – After Action Report – Scenario E – West Tank Barrier – Dude! Take Your Turn!
Pingback: Combat Commander – After Action Report – Scenario #30 – Red Skies at Night – Dude! Take Your Turn!
Pingback: Combat Commander – After Action Report – Scenario #14 – At the Crossroads – Dude! Take Your Turn!
Pingback: Combat Commander – After Action Report – Scenario #9 – Rush to Contact – Dude! Take Your Turn!
Pingback: Combat Commander – After Action Report – Scenario 90 – The Man Who Would Be King – Dude! Take Your Turn!
Pingback: Combat Commander – After Action Report – Scenario 51 – The Uneasy Wait – Dude! Take Your Turn!
Fantastic report of very exciting session. And I can’t wait to see the Video report from your game!
LikeLiked by 1 person
Yeah, it was fun playing Patrick! I guess it will be 2 more years until it happens again 🙂
LikeLike
Pingback: Combat Commander – After Action Report – Scenario #23 – No-Man’s Land – Dude! Take Your Turn!
Pingback: Combat Commander – After Action Report – Scenario #112 – Sonnenwende – Dude! Take Your Turn!
Oh wow, a victory against such an experienced player! Congratulations!
LikeLiked by 1 person
Thank you!
LikeLiked by 1 person
Pingback: Friday Night Shots – Update & Topic Ideas? – Dude! Take Your Turn!
Pingback: August 2023 Gaming – Dude! Take Your Turn!
Pingback: Combat Commander – After Action Report – Scenario L – Slopes of Hell – Dude! Take Your Turn!
Pingback: Combat Commander – After Action Report – Scenario M10 – Bulolo River Bridge – Dude! Take Your Turn!
Pingback: Combat Commander – After Action Report – Scenario 44 – Stalingrad of the North – Dude! Take Your Turn!