Dude! Take Your Turn!
A Gaming Life
Combat Commander – After Action Report – Scenario 74 – Sturmgruppe Granit
Welcome to another amazing tale from the Combat Commander ladder, that monthly chance for me to play one of my favourite games of all time!
Run by the sensational Patrick Pence, he of Patrick’s Tactics & Tutorials fame (one day I will be featured on that channel), the ladder is a great opportunity for me because it gives me an excellent opportunity to lose at the game!
We get to play a different person each month, though this month’s opponent was my second repeat opponent, Stan M!
I originally played him back in January 2022 where he beat me in a fairly close game.
Maybe with a second repeat opponent, this means I’ll play Patrick again some day?
One can hope.
Anyway, this month’s scenario was from the Fall of the West battle pack, and mercifully didn’t include any tanks.
It pits the Belgians (Light blue, Stan, using the French deck and discarding rules) against the Germans (Grey – Me) as the Germans attempt to destroy and isolate some bunkers during their initial blitz of the country.

There are a bunch of special rules that are kind of interesting.
First, the Germans can destroy the three bunkers by activating a unit next to them with an Artillery Request order. This will destroy the bunker and attack the units in it with a 9 firepower attack against them.
Secondly, Belgians in bunkers can advance from one bunker to another. We didn’t end up using that.
However, as long as two bunkers remain in play, any Belgians who are eliminated don’t go to the casualty track. They go to the next Time track and come on as reinforcements.
So the Germans really need to destroy two bunkers quickly.
Thirdly, Objective 5 (near the bottom of the map) can be destroyed by the Germans with an Artillery Support order and an adjacent unit. If they do that, it’s forever destroyed and the Germans get 5 VP (the Belgians can’t get those back).
There’s also a bit of a Belgian artillery special rule, but since that didn’t really come into play in our game, we’ll just ignore that.
Was I able to pull this one out?
Let’s see!
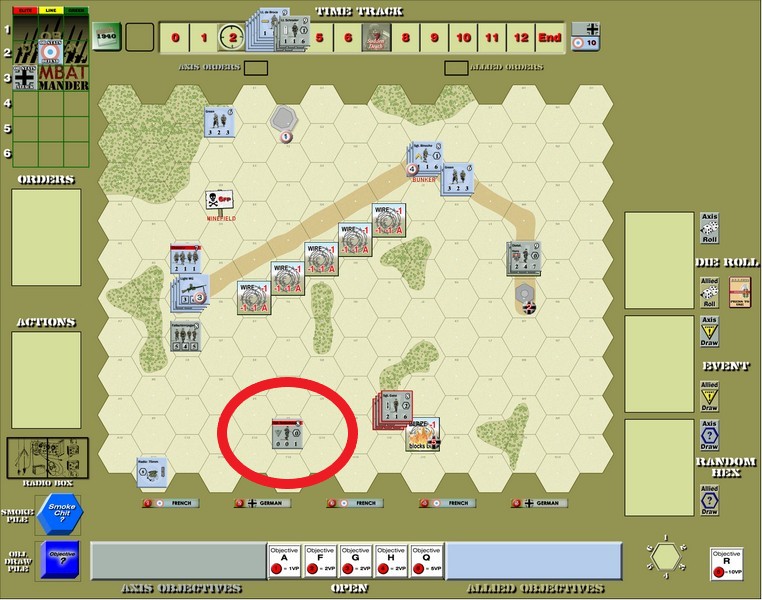
Before I begin the actual AAR, I want to say something about this scenario and the setup.
This is one of the only (that I’m aware of, anyway) scenarios where one side can actually set up in melee with the other side.
The Germans have a fixed setup, with all units in a designated hex. The only choice you get is who, in one specific hex, you give the machine gun to.
The Belgians can then set up anywhere 6 hexes deep from the top of the map.
This means that the Belgians can actually set up in melee with Cpl Rettenhaus and one parachute squad.
I have a huge problem with this.
With the Combat Commander stacking limits, this means that the Belgians can start off with a melee hex where they have a 17 firepower versus 8 firepower advantage.
It is a risk.
It’s a +9 advantage and you might not start with an Ambush and the Germans may start with one (or even two, since they are in Attack mode and thus have 6 cards).
But if things work out right for the Belgians, they can effectively eliminate one of the five German squads, along with one of the two leaders, that they get at the start of the game.
Stan put his “1” leader in the hex instead of his “2” leader, so it was only 13-8, but it was still a risk I wasn’t willing to take.
Especially because I didn’t have any Ambushes!
The Germans have one order to get out of the hex if they want to. After the first order, if the melee still exists, it happens.
I really don’t like that this is even a possibility.
This is nothing against Stan. The rules allow it, so good on him for taking advantage of it.
I just have a problem with it actually being a possibility.
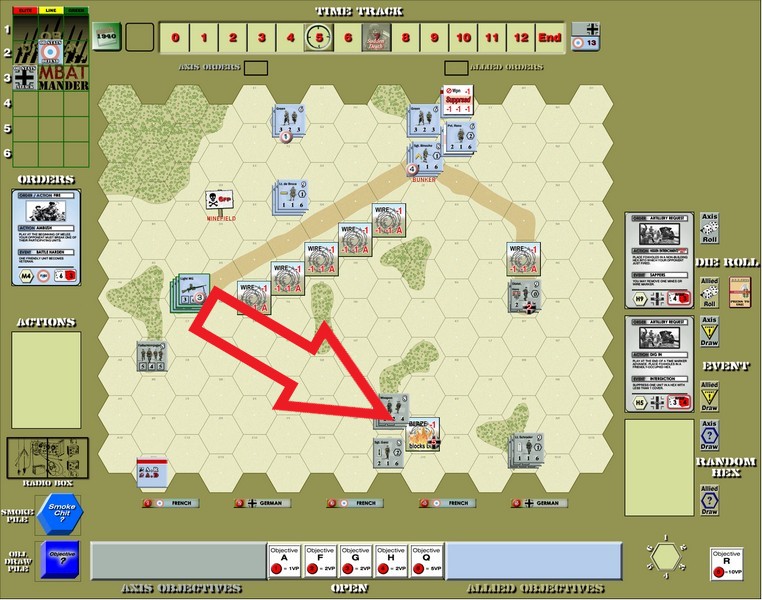
Anyway, since I did have an Advance and a Movement card, I debated whether to Move away or to Advance. Moving would let him fire at me if he had a Fire card.
Advancing would prevent that, but would only let me move one hex.
I decided to Advance.

And promptly Advanced into a minefield (and I discovered afterward that he also had a Fire card, so moving would have just killed me faster most likely)
The squad was suppressed and Rettenhaus broke.
I also moved the squad near the right bunker (it was only one squad, I had actually mistakenly set up Ganz and his weapon team in that hex as well, but he should have been in the center) up adjacent to that bunker.
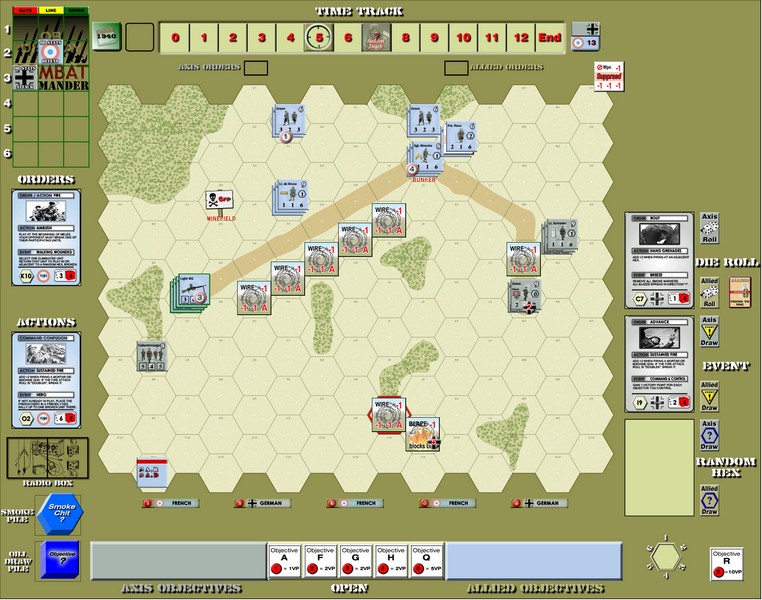
Not receiving any Fire, I played a Recover…and Rettenhaus failed!
Fire from the left bunker killed Rettenhaus (and broke the squad) before he could do anything, and I was left cursing this stupid setup rule.
I immediately destroyed the right bunker with an Artillery Request, breaking the squad in it as well!
Stan then proceeded to eliminate the broken German squad with Fire, leaving me cursing even louder (internally, I didn’t vocalize it) about this stupid setup rule.
Binoche then proceeded to move adjacent to another lone German squad.

Right from the beginning, things weren’t looking good.
Ganz’s men had moved south and ended up destroying the #5 Objective, getting me 5 points. Meanwhile, Binoche and his men jumped on my lone squad, though I did have 2 Ambushes.

Sadly, Stan drew an 11 to beat my otherwise pretty strong melee strength. I passed him the initiative, and he drew a 10, eliminating my squad.
That was very consequential.
Eliminating Binoche and three Belgian weapons teams would have been huge!
Instead, I was down another squad.
I did manage to rout one of those broken Belgian teams (from the Ambushes) into the minefield and they died. But since I had only destroyed one Bunker so far, they just went right back to the reinforcement track.
But Dietel (the German Hero) did show up!
I also eliminated the Belgian squad that was in the destroyed bunker, but again it didn’t do anything for me.
I had to destroy that second bunker!

And I finally did, moving up next to it and Stan didn’t have a Fire card. Next turn, it blew up.
Of course, with my inability to draw anything useful, the squad that did that was situated right up next to a bunch of pissed of Belgians (is that an oxymoron? Or is that just Canadians?).
A lot of inconsequential stuff happened, but then Stan drew a Walking Wounded event. Since only German units had been destroyed, Cpl Rettenhaus came back into the fight!
Broken and sitting in the open, but he was back.
And then he died again.
Again, not a lot of major stuff happened, though a bunch of Belgian reinforcements came onto the board after one of the many Time triggers.
Stan kept on firing on Ganz and the units in the brush who were just trying to stay out of the line of fire.
Eventually, he ended up breaking them.
This was my one major mistake in the game (as opposed to just bad luck or bad setup rules). I should have moved them all one hex, to get them out of the squad’s range. I could have taken the MG fire, but the squad plus MG just was too much.
Especially once Stan put Wire in the hex, preventing them from moving much.
And then they broke, which means they couldn’t even move into cover. They would have had to move into open ground, which again (in hindsight) would have been out of the squad’s range and probably a good idea.
But I didn’t think of that.
I couldn’t find a Recover card to save my life at this point.
Some final fire killed both Ganz and the weapons team, putting me at my Surrender limit.
Here’s the final map.
Sorry for the very brief AAR.
This scenario…sucked. Big time.
I didn’t like the beginning of it, and then Stan proceeded to make it worse for me.
That’s what a good player does, of course. So that’s nothing against Stan at all.
But I don’t like how it’s possible for the scenario to begin, and then it just cascaded from there.
I admit that I couldn’t draw the cards that I needed when I needed them, and I didn’t play very well overall.
I let the beginning be kind of demoralizing and I didn’t recover my own personal morale to actually try to salvage something from that debacle.
Stan played a great game, taking advantage of every opportunity and mistake I made.
The last devastating mistake I made was not moving Ganz and his men out from under all that fire, but I’m not sure it would have made much difference.
It just would have extended the 90 minute run time of this scenario.
Still, Stan played great. He was a gracious and skilled opponent and I wish him the best in the future games (except if we end up matching up a 3rd time, of course).
This loss puts me at 17-16 in my ladder career.
I really need a win next month!
Next month’s scenario is from the Sea Lion battle pack.
A friend and I played one possible scenario from it last week. I may write up the AAR for it because it was a fun scenario!
Whichever one it is, I’m sure it will be great.
And hopefully I’ll be victorious!
Then again, if I keep losing, maybe I’ll get down to Patrick’s level and actually play him again.
Yeah, sorry. I couldn’t resist.
Anyway, if this sounded appealing to you, why not join us on the Combat Commander ladder?
We’re a great bunch of guys (and if you’re a female wargamer, we’d love to have you on the ladder!) and not only do you get to play a monthly game of one of the best games out there, but there’s almost always the opportunity for pickup games if you just want to cheat practice, or play some other scenario.
My tip for this month?
Don’t piss off the Belgians, even with their 1-discard limit (which sadly never seemed to bother Stan).
See you next month!
Combat Commander Ladder – After Action Reports
To see all of my Ladder After Action Reports since May 2021, go here!

Pingback: February 2024 Gaming – Dude! Take Your Turn!
This looks like a scenario on a knife’s edge! Once you’ve fallen off, there is no saving anymore…
LikeLiked by 1 person
Yeah, not a lot of room for error. Surprisingly, not many Belgian players actually set up in melee this month. Not sure why not.
LikeLiked by 1 person
Well, both the French and the Dutch regard the Belgians as a little stupid…
LikeLiked by 1 person
oooooooooooooooooooooooooo SNAP!!!!
LikeLiked by 1 person