Dude! Take Your Turn!
A Gaming Life
Combat Commander – After Action Report – Scenario A – Grassy Knoll
Another month and another great game of Combat Commander, this time of the Pacific variety!
Once a month, those of us on the Combat Commander ladder led by the illustrious Patrick Pence are able to immerse themselves in vicious combat against a very capable opponent.
If you have any interest in Combat Commander at all, I suggest you join the ladder. You might even get to play me!
September’s game was from the Combat Commander: Pacific game so it was a bit different than previous outings.
New rules, new cards, and forces from the Japanese, United States, and Commonwealth countries add some interesting things to the mix. Some of the Combat Commander: Europe stuff is completely changed.
It took a little getting used to (though I actually own Pacific, so that is nice at least).
(Incidentally, you can click on or tap each picture for a bigger view of it)
My opponent for September’s ladder game was Bill Simoni. He was the attacking American forces (green) and I was the Japanese (white), determined to defend the Grassy Knoll (no, this didn’t take place in Dallas).
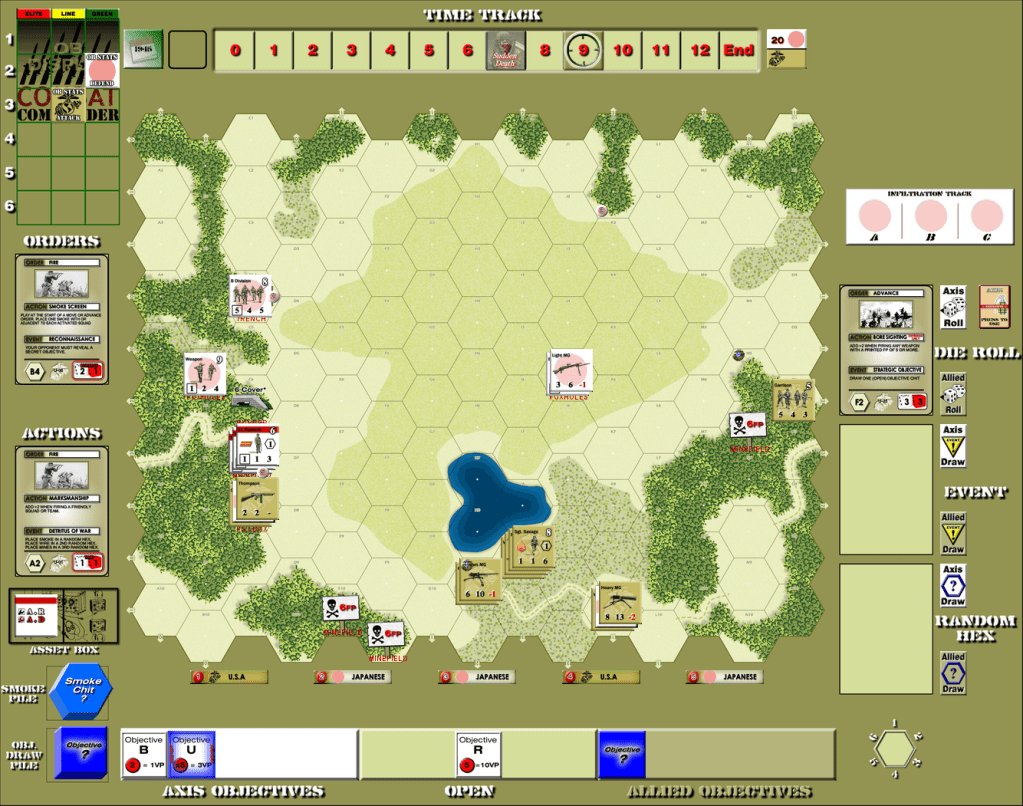
This is how we set up.
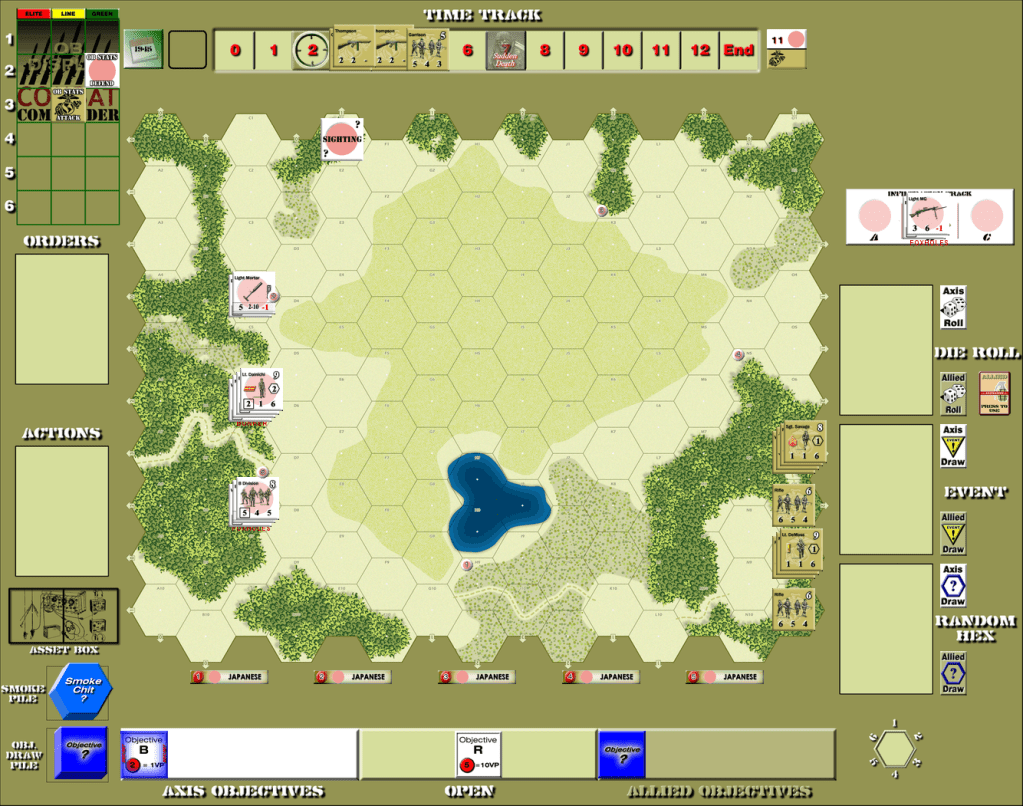
The hex between two of my stacks of units, Objective 5, is worth 10 victory points. Very juicy! I control it at start, so if the Americans take it, that’s a 20-point swing (I lose 10 VP and then the US gains 10 VP).
As you can see, quite important!
The Americans are hiding in the jungle, determined to advance along the south. The north is not a consideration, but they do have reinforcements that could come in on the north edge, so I had to be wary of that.
I set up the main bunker and the only Japanese leader next to the objective hex with the other units in Foxholes or a Trench within command radius so they could all be activated at the same time.
I also have one team, one squad, a light machine gun, and some foxholes that can infiltrate somewhere on the map (where the “Sighting” marker is, which can change with each random hex draw) sometime during the game.
Sergeant Savage began the game advancing his squad and the 50 caliber machine gun to a space where he could fire…and he blundered into booby traps.
Both sides exchanged some potshots and the Japanese broke a couple of units but didn’t do any major damage.
Then the US discarded and a Japanese hidden unit showed up!
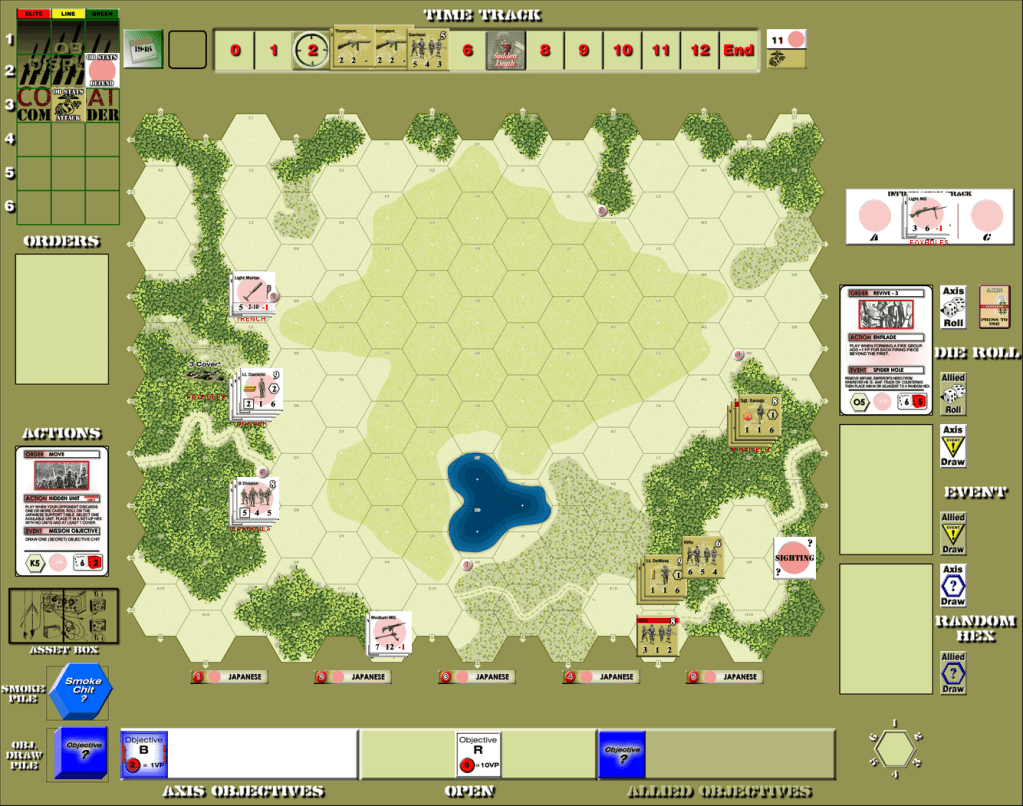
Where did that machine gun come from? (at the bottom of the map). It had been lying there all the time.
Did it do anything?
No, just gave the US some victory points.
But it could have!
(The Japanese had a lot of trouble drawing Fire cards early).
However, some early fire produced a Japanese sniper that was surprisingly effective!

One broken unit destroyed. And more Japanese victory points.
This scenario, my sniper was more effective than it’s ever been in my games with Michal.
On the other hand, Bill got Air Support three times!
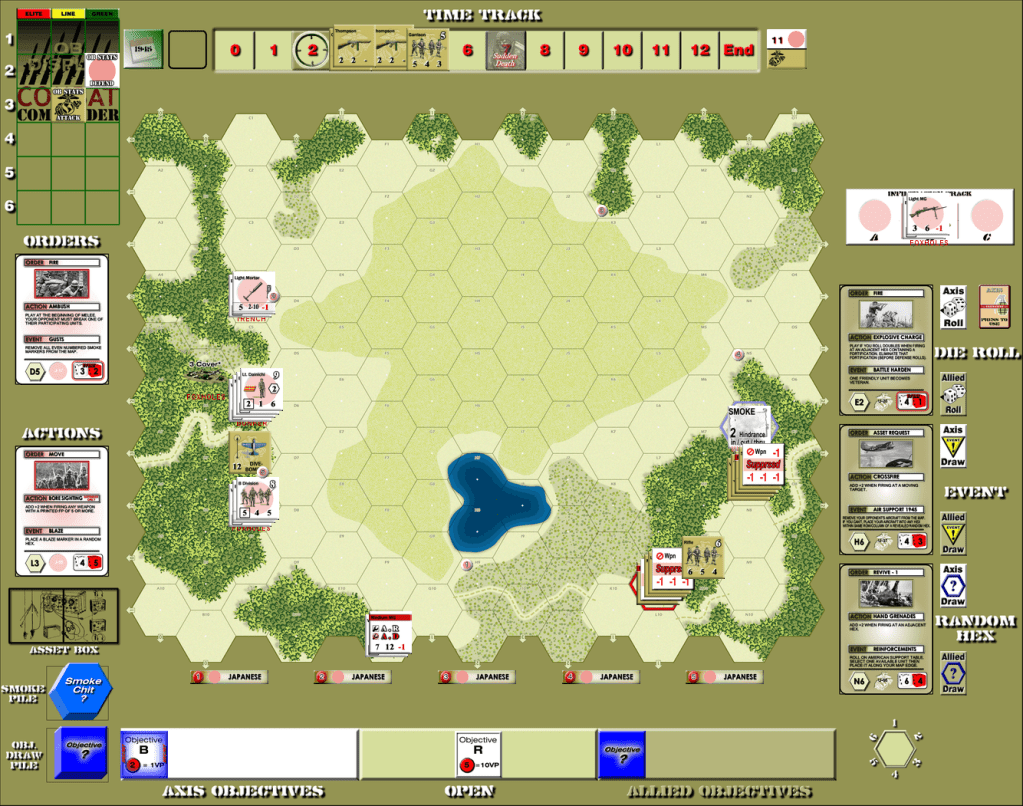
Thankfully, his dive bomber ended up doing nothing all three times, but still!
I was annoyed. I also discovered later that the Japanese don’t have any Air Support cards in 1945 (the year this scenario takes place) so I was looking in vain for Air Support of my own.
And then another Japanese sniper takes out a broken unit!
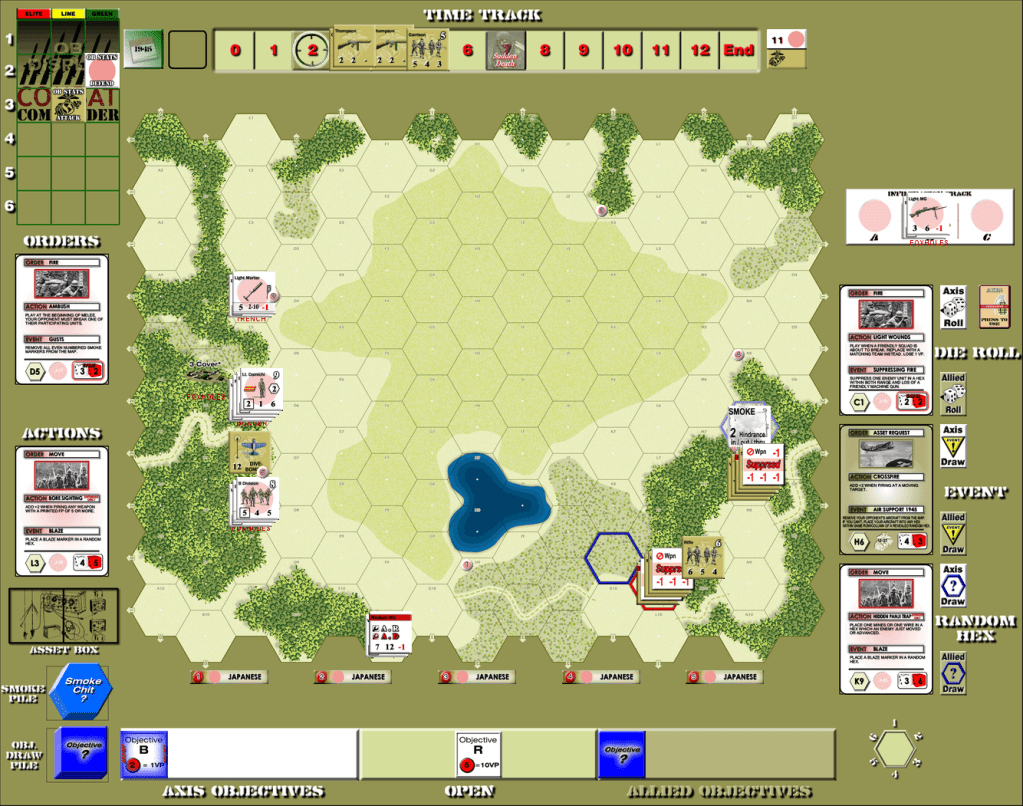
I’ve never seen snipers this effective.
Some more potshots traded, ineffective bombers, and then a Time event brought out Bill’s first reinforcements…who promptly dropped on the formerly-hidden machine gunners who hadn’t done squat all since they showed up!
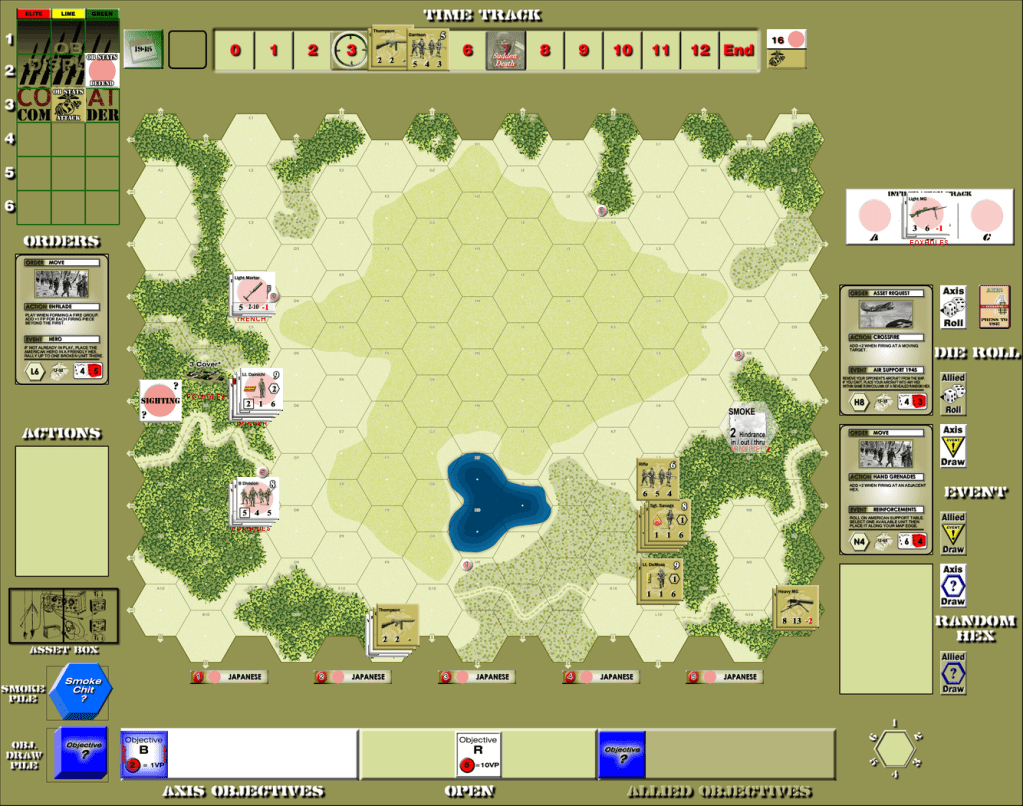
One melee later, the US had some points and the formerly-hidden unit was now currently dead.
With that MG eliminated, the US continued to move along the southern border and the Japanese couldn’t do anything (and the US even managed to eliminate the Japanese big gun).
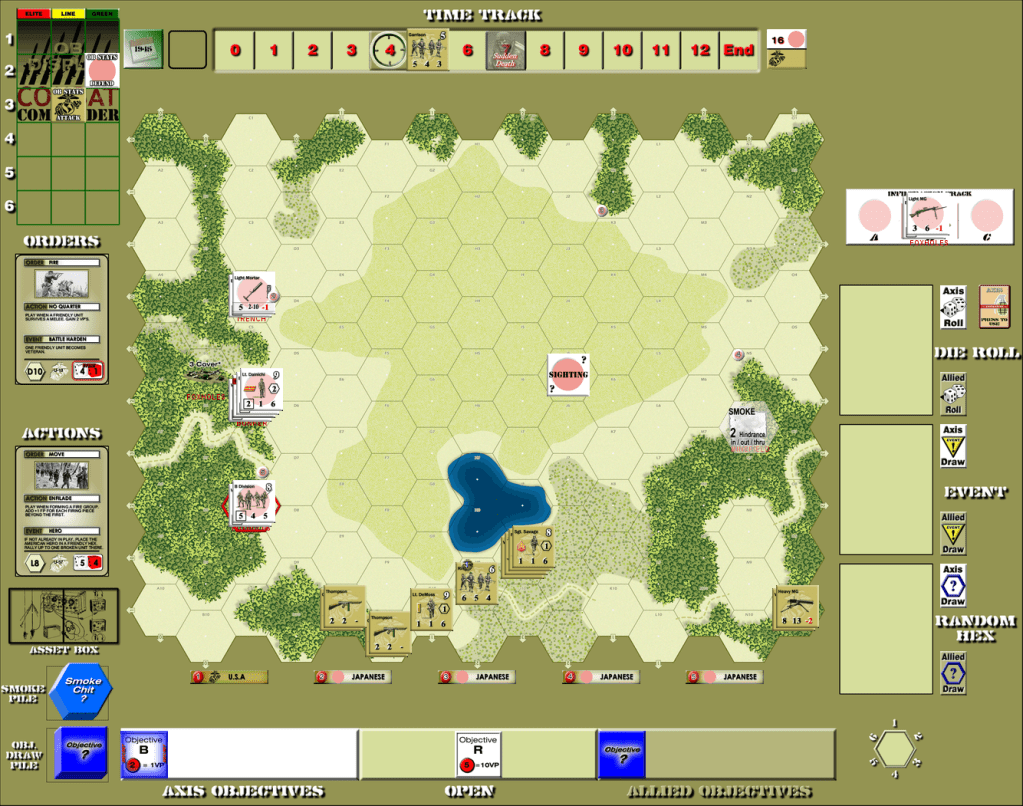
Something was going to have to give soon.
Throughout the scenario, Bill managed to break and destroy every one of my heavy weapons. My ranged fire was very limited, but he was getting closer to me so my squads’ firepower could actually do something.
The big grass field in the middle of the map was really annoying, though.
It hinders fire across it, and almost all fire is across it until you get up close.
More firing, the US blundering into a couple of booby traps that end up not doing much, and then they charge the Japanese positions.
Only to find that Lt. Ishabashi had been hiding all along and shows up to lead the beleaguered troops that are just about to be attacked by the dastardly Marines!

That was fortuitous.
But things took a turn for the worse for the Japanese as murderous fire poured into the new leader’s hex, breaking everybody. As the Marines move in for melee, the Japanese advance out of the hex and surrender the newly acquired Pillbox.
The Japanese, in desperation, play an Asset Request and manage to get a 150 mm radio for artillery! Wow, that could be a game-changer.
The artillery is called down even as a US sniper takes out the formerly-hidden leader (something about formerly-hidden units not sticking around in this scenario).
And the artillery works!
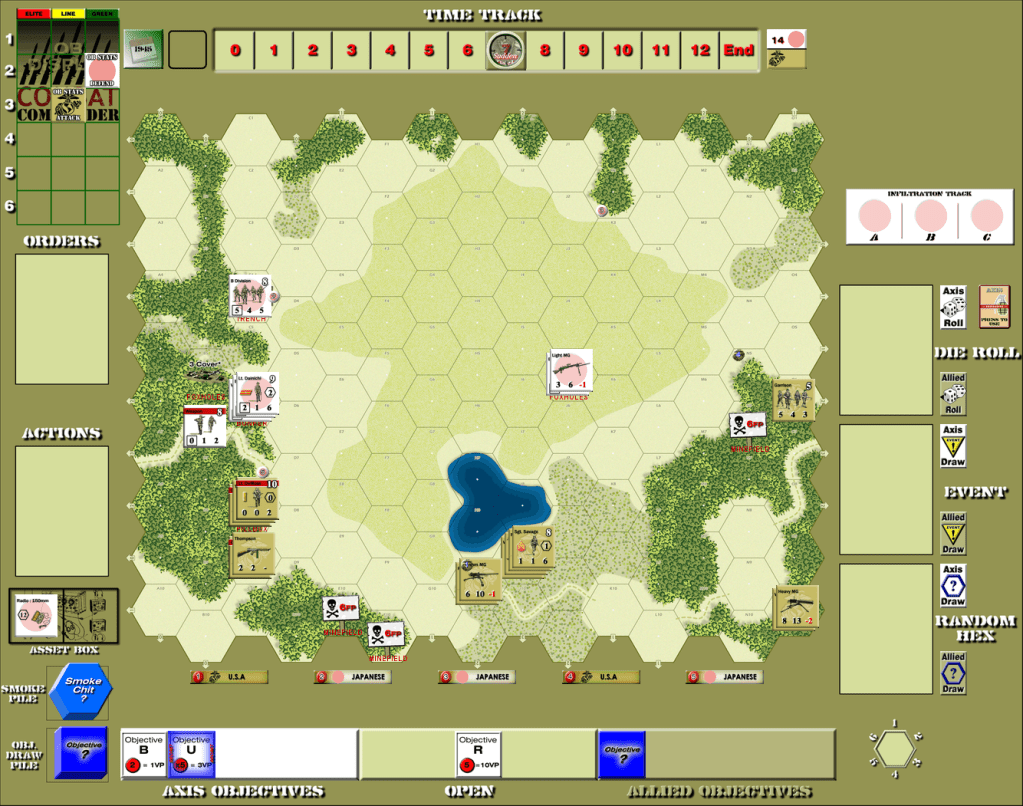
A couple of broken US Marine units that sadly will rally fairly swiftly.
After rallying, they advance into the main objective hex! Wow, 20 US points gives them the lead! (even though they stumble into more booby traps).

Suddenly, Time triggers to advance the clock are not an ally to the Japanese, who don’t want the game to end.
We’ve already survived one Sudden Death roll.
Another Sudden Death roll on a Time trigger results in the game continuing still (the Japanese have the initiative, thank God).
In desperation, with time advancing and the US in the lead, the Japanese storm out of their bunker and charge into the objective hex, booby traps and all! Thankfully, only the leader is Suppressed and nobody is broken.
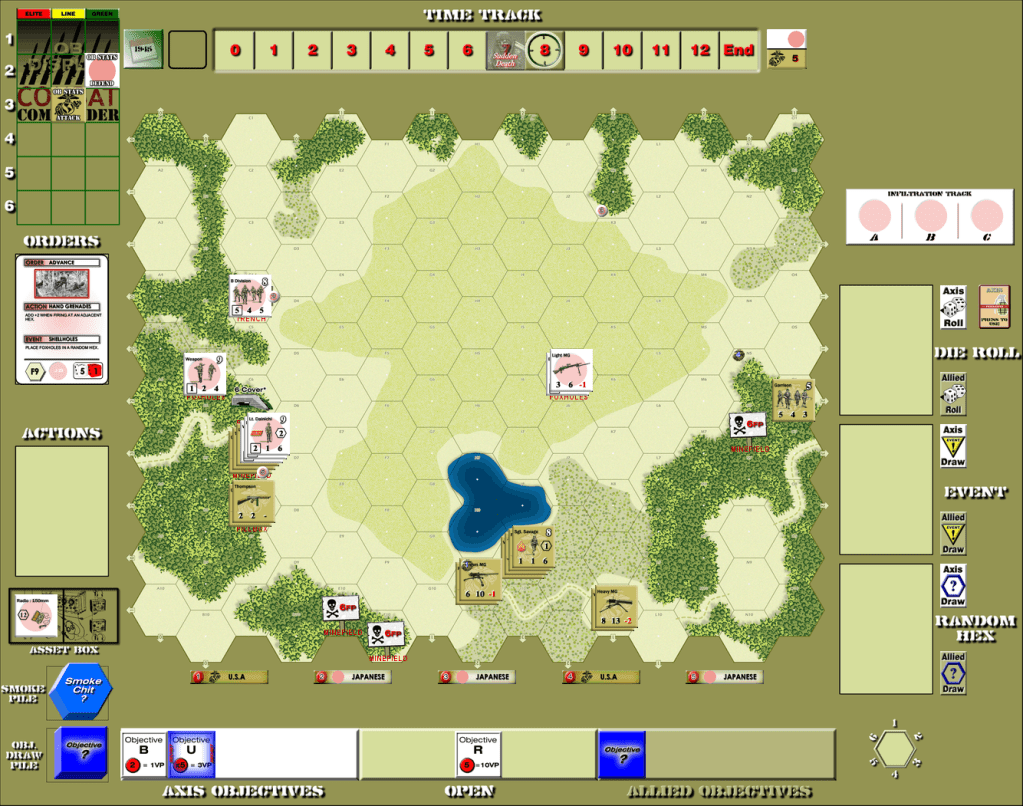
This is for it all.
The Japanese have an Ambush card which breaks the US leader, but the Japanese units all excel at melee, thus giving them a 14-5 edge in melee firepower.
The result is as predicted. The US Marines are gone and the Japanese get 20 more points! Plus the points for destroying units.
The 50 caliber opens up and all of the Japanese units in the objective hex break!
This can’t be good.
Thankfully, as part of rolling those morale checks, the Japanese deck runs out and the Sudden Death roll ends the game.
Wow, this was a nail-biter that went back and forth. I thought I was going to hold on by the skin of my teeth, then I thought Bill had it won.
I didn’t realize (not having played Pacific before) how good the Japanese are in melee, though.
They are dangerous!
Bill was a great opponent. We were supposed to play a Europe game as part of June’s Ladder match, but I had to cancel due to it being a horrible month.
It was good to be matched up against him so we could get our game in.
He fought it to the last and came very close to winning. He was also a friendly and gracious opponent.
That puts me at 3-1 in my Ladder games.
That makes me very happy.
Let’s see what October brings! It will be another Pacific game, this time using the New Guinea battle pack.
Combat Commander Ladder – After Action Reports
To see all of my Ladder After Action Reports since May 2021, go here!
Pingback: Combat Commander – After Action Report – Scenario #34 – Encircled at Hill 30 – Dude! Take Your Turn!
Pingback: Combat Commander – After Action Report – Scenario #23 – No-Man’s Land – Dude! Take Your Turn!
Pingback: Combat Commander – After Action Report – Scenario #112 – Sonnenwende – Dude! Take Your Turn!
Pingback: New To Me – September 2021 – Dude! Take Your Turn!
Pingback: Combat Commander Pacific – After Action Report – Scenario M6 – Breakout – Dude! Take Your Turn!
Pingback: Combat Commander Europe – After Action Report – Scenario 35 – Spartakovka Salient – Dude! Take Your Turn!
Pingback: Combat Commander Europe – After Action Report – Scenario 51 – The Uneasy Wait – Dude! Take Your Turn!
Pingback: Combat Commander Europe – After Action Report – Scenario 65 – Road Trip – Dude! Take Your Turn!
Pingback: Combat Commander Europe – After Action Report – Scenario 75 – Sturmgruppe Beton – Dude! Take Your Turn!
Pingback: Combat Commander Europe – After Action Report – Scenario 90 – The Man Who Would Be King – Dude! Take Your Turn!
Pingback: Combat Commander Europe – After Action Report – Scenario LoM9 – Operation Mercury – Dude! Take Your Turn!
Pingback: Combat Commander Europe – After Action Report – Scenario #119 – Sky Fall – Dude! Take Your Turn!
Pingback: Combat Commander Europe – After Action Report – Scenario #9 – Rush to Contact – Dude! Take Your Turn!
Pingback: Combat Commander Europe – After Action Report – Scenario #14 – At the Crossroads – Dude! Take Your Turn!
Pingback: Combat Commander Europe – After Action Report – Scenario #30 – Red Skies at Night – Dude! Take Your Turn!
Pingback: Combat Commander Pacific – After Action Report – Scenario E – West Tank Barrier – Dude! Take Your Turn!
Pingback: COMBAT COMMANDER PACIFIC – AFTER ACTION REPORT – SCENARIO M4 – TEMPLETON’S CROSSING – Dude! Take Your Turn!
Pingback: Combat Commander Europe – After Action Report – Scenario #41 – The Commissar House – Dude! Take Your Turn!
Pingback: Combat Commander After Action Report – Scenario #53 – Deeds Not Words – Dude! Take Your Turn!
Pingback: Combat Commander After Action Report – Scenario #67 – The Orient Express – Dude! Take Your Turn!
Pingback: Combat Commander After Action Report – Scenario #82 – Hidden Guns Lash Out – Dude! Take Your Turn!
Pingback: Combat Commander After Action Report – Scenario #91 – The Battle of Trafalgar – Dude! Take Your Turn!
Pingback: Combat Commander After Action Report – Scenario LoM #8 – Codes in the Sunrise – Dude! Take Your Turn!
Pingback: Combat Commander After Action Report – Scenario #105 – La Fiere Counterattack – Dude! Take Your Turn!
Pingback: Combat Commander After Action Report Supplemental – Scenario #28 – No Ingouf Around – Dude! Take Your Turn!
Pingback: Combat Commander After Action Report – Scenario #10 – Commando School – Dude! Take Your Turn!
Pingback: Combat Commander After Action Report Supplemental No. 2 – Scenario #92 – Let England Shake – Dude! Take Your Turn!
Pingback: Combat Commander After Action Report – Scenario #20 – A March in December – Dude! Take Your Turn!
Pingback: Combat Commander After Action Report – Scenario #33 – We Go! – Dude! Take Your Turn!
Pingback: Combat Commander – After Action Report – Scenario L – Slopes of Hell – Dude! Take Your Turn!
Pingback: Combat Commander – After Action Report – Scenario M10 – Bulolo River Bridge – Dude! Take Your Turn!
Pingback: Combat Commander – After Action Report – Scenario 44 – Stalingrad of the North – Dude! Take Your Turn!