Dude! Take Your Turn!
A Gaming Life
Combat Commander – After Action Report – Scenario 35 – Spartakovka Salient
After two months in the jungles of the Pacific Ocean, November’s Combat Commander Ladder scenario takes us back to the Eastern Front in Europe, namely the Stalingrad Battle Pack for Combat Commander: Europe.
This is my sixth month of playing in the Combat Commander Ladder run by the extremely talented Patrick Pence of Patrick’s Tactics & Tutorials fame (and you really should check out his videos).
When you hear “Stalingrad,” you would think of tense (and dense) city fighting with no holds barred and ultimate savagery.
Scenario #35, Spartakovka Salient, is only one of those, unfortunately.
It’s savage, but being the first scenario in the Battle Pack, it actually takes place as the Germans are approaching Stalingrad.
I’m #8 on the Ladder after a 4-1 record and this month I was facing off against Mark V from Boston.
We spent a nice Friday night on the fields of Soviet Russia just outside a city that would feel carnage and desolation over the next six months.
Mark was the attacking Germans (grey) and I was the defending Russians (brown).
In this scenario, points for exiting units are doubled, so the Germans really want to get units off the board. The Russians can score points that way too, but with their limited movement and only two leaders, that’s not really a possibility.

Here’s the setup. The main Russian strongpoint is the building (Objective 5) in the center by the pond. It has the Russian Medium Machine-Gun (MMG) and a squad along with their best leader.
The Russians are hampered by having to set up a squad in each of the four objectives controlled by the Russians. Thus many squads are outside the leadership radius of the minimal leaders the Russians have.
They are also stuck with only having one Order until the first Time Event hits. That can be quite limiting.
The Germans not only have a Light Mortar that they’re carting around to start, but on Round 2, one of the best German leaders along with some elite infantry and a Heavy Machine-Gun will be entering!
It’s up to the initial German forces to break through and make things easier for the reinforcements.
Did that happen?
Let’s take a look.
The Germans started out by discarding, allowing the Russians to move their exposed Militia squad out of harm’s way in the south.
The Germans started advancing into position, the Russian soldiers hearing the marching of combat boots through the forest.

The Russians were holding their fire, waiting for targets to present themselves.
As the Germans appeared on the edge of the forest, the MMG opens up! Germans were falling back in disarray.

But one squad quickly recovered.
The Russians opened up hoping to kill the remaining broken unit, but the MMG jammed!
Thankfully, a subsequent German move and Russian Opportunity Fire resulted in the MMG being fixed.
The Germans fired into the building with the MMG, hoping to get rid of the strongpoint, but instead it turned out it’s a Pillbox!
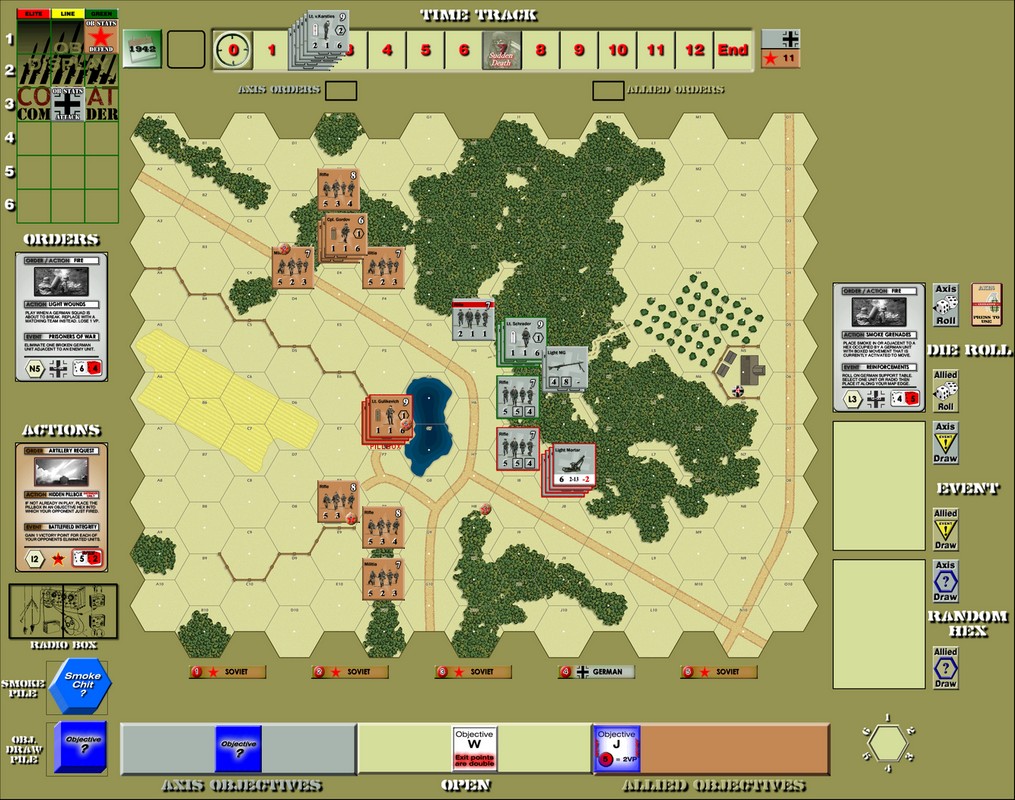
This gives the Russians +5 Cover instead of +3, and an additional +1 against the Mortar.
They shrugged off the gnat-like fire.
As part of another Fire attack, a KIA event killed the broken German unit (this will be important later).
The Germans did some more firing, breaking the squads in hexes E8 and F8, but they drew a Time Event!
We were into Round 1 now, and the Russians get another Order, giving them two.
The Germans began attacking again, moving out into the open road with one squad.
That was a mistake.

It quickly broke, along with the squad and team with the Light Mortar. The units in the forest rallied easily but the squad in the road still continued to panic.
Mark drew a 12 (Time Event) trying to rally that squad, so he gave me the Initiative because he didn’t want Time moving that fast.
I kept it the rest of the game.
While firing, the Germans drew a Walking Wounded event!
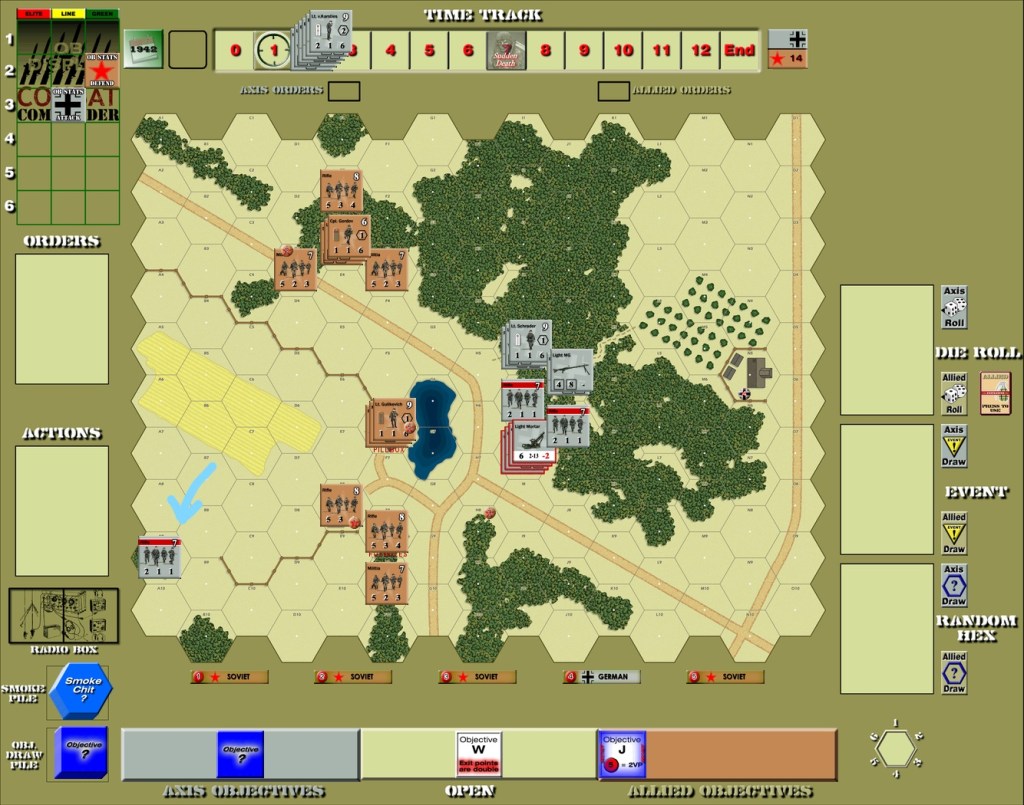
And the broken unit appeared in a great spot for Mark.
His next Order was an Advance and that squad quickly exited the board for 4 points. It would also be appearing with the reinforcements after the next Time Event.
More firing broke two Russian squads and brought on a Time trigger!
Round 2 and those reinforcements were coming onto the board.
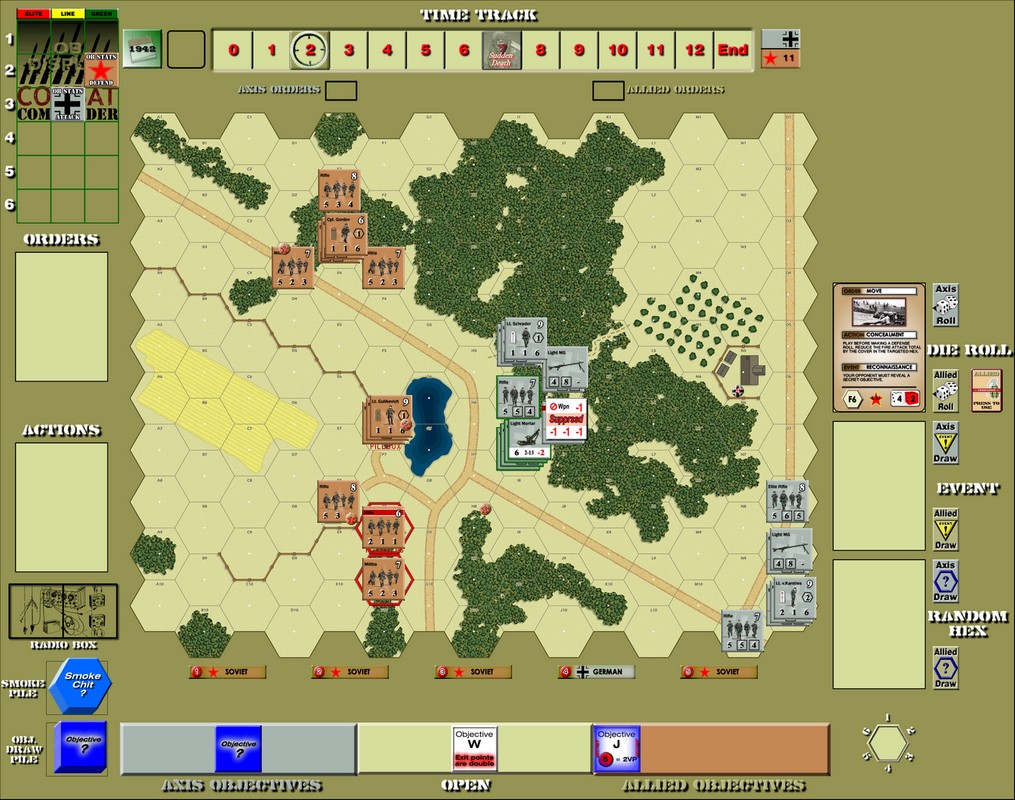
They came in on the right side of the board and they were ready to roll.
They moved forward but unfortunately the Russians didn’t have a Fire card!
They did have some Wire, which they put into the middle of the road. The rest of the German reinforcements were getting into position, though.

The Germans kept moving forward, but Lt. von Karsties and the Heavy Machine-Gun (HMG) stumbled into more Wire!

Since weapons cannot be used in Wire, the HMG was useless at the moment.
More German Fire caused another Time Event and things were moving a bit fast for the Germans.
Van Karsties tried to get out of the Wire and not only was fired upon, but also stumbled into a Minefield!
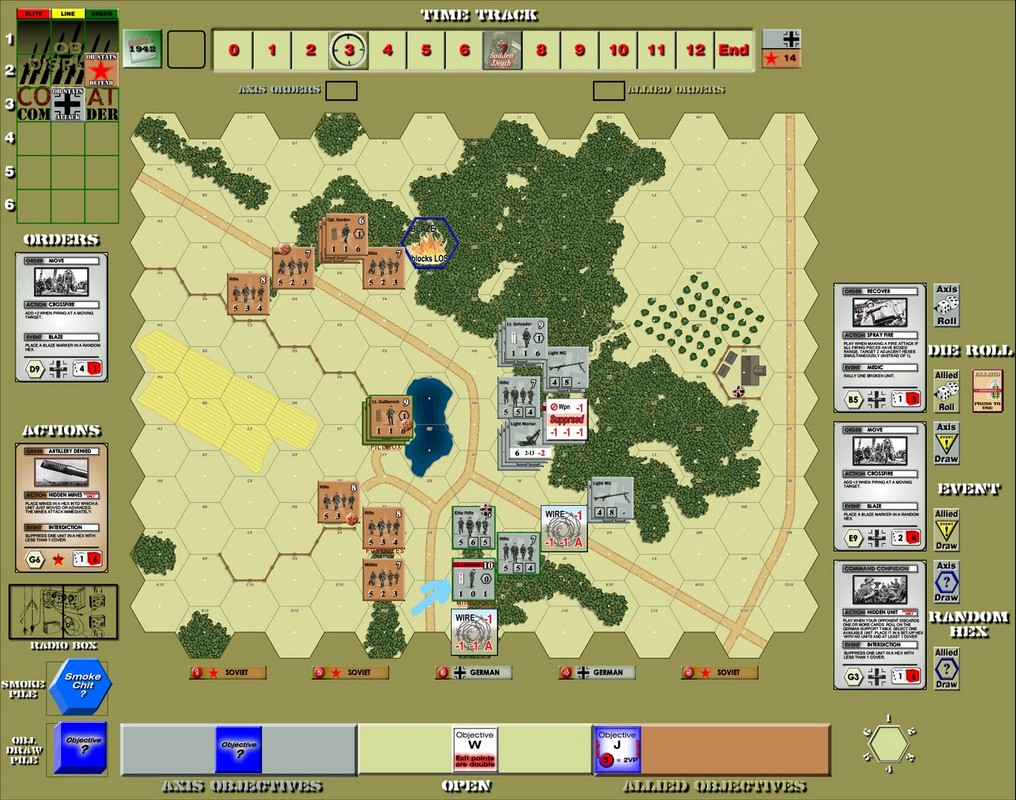
The squad broke under the fire and then the Minefield killed them.
Bye-bye HMG.
Both sides traded fire and a sniper killed another broken German unit. Another couple of Time triggers happened as well!
And then the Germans made their move.
After the Time Trigger, I had 3 cards and they all had the Dig In action. I played them all.
With no cards in my hand, Mark was free to move everybody! (Though he said he thought I had one card and would have been chancing the move anyway).

Suddenly the main Russian position was in jeopardy!
With the Russians spending their turn replenishing their hand, there was nothing stopping the Germans from taking over the Pillbox.
No Ambushes on either side, Mark put two Squads along with the leader into the melee so that victory was assured (even though he would lose a point from having to kill a deployed team due to stacking limits).

After a great start, things were starting to look bleak for the Russians.
Some hope was gained, however, as the Germans moved their Light Mortar stack through the hole in the Russian lines to try and Exit them, and paid dearly for it.
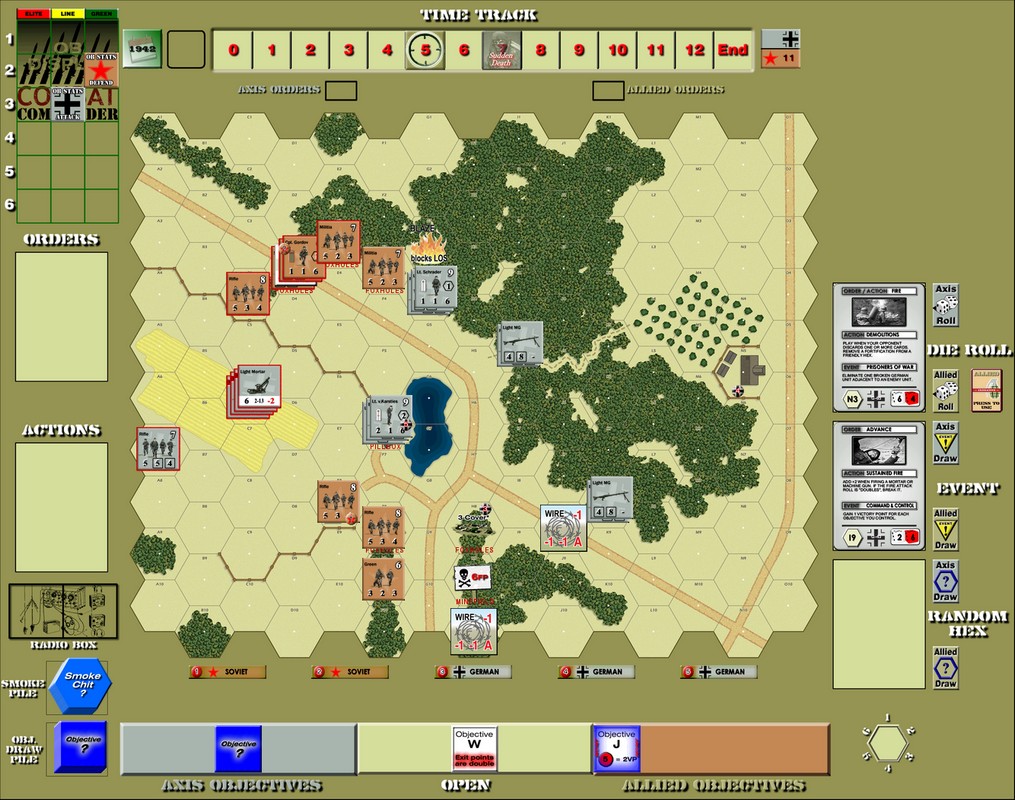
Though the lone squad did make a dash and reach the edge of the map.
A couple of turns later, two of those three broken German units, along with the Light Mortar, were gone. Russian hope survived!
The Weapons Team was the only one to survive. It rallied and eventually moved off the board. The squad that’s already on the edge of the board, though, was broken by a sniper.

Mark was also able to get von Karsties and his squad off the map for 10 VP. A large chunk of the Russian lead was gone!
Later on, Mark drew another Walking Wounded Event and once again it appeared on the edge of the map, ready to Exit.
However, both decks were running low and with only two more Time Events to the first Sudden Death, things were tight.
When the first Sudden Death hit, I drew a 4 and since I had Initiative, the game was over!
The Russians had 4 VP…would the revealing of Hidden Objectives give the Germans the win?
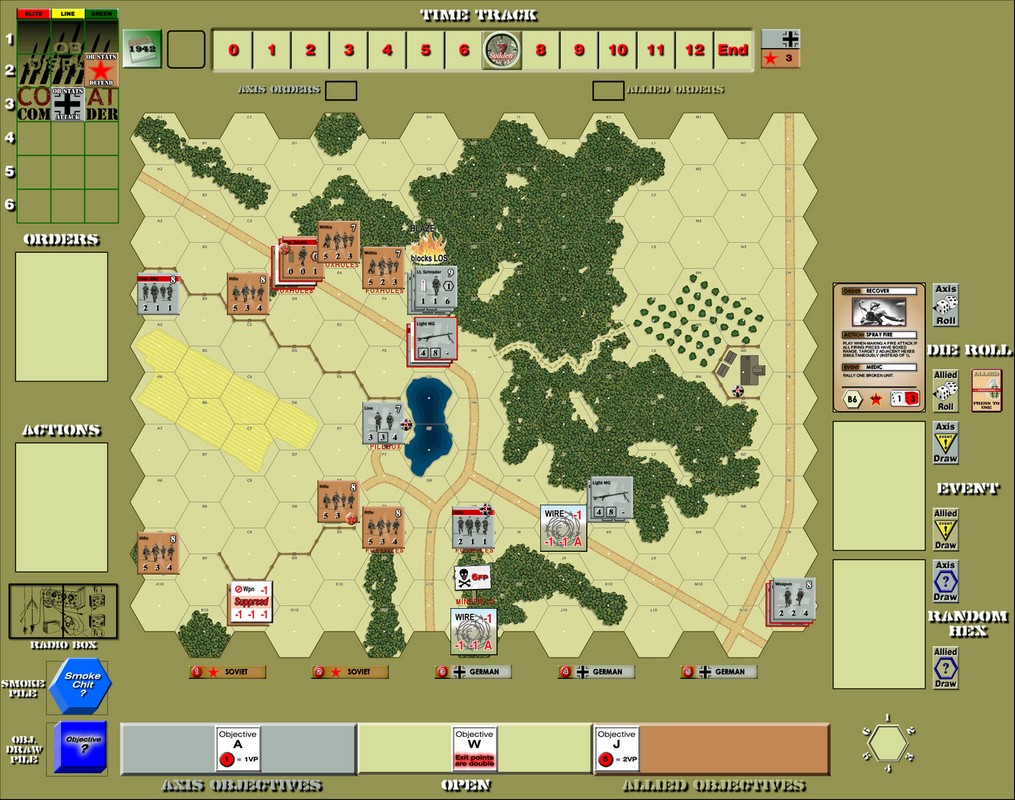
No! The Russians received one point for holding Objective #1 and the Germans got 2 points for holding Objective #5.
It was a 3 VP Russian win!
This was a nail-biter of a scenario. If Mark had had one more turn and one more Move/Advance card, the squad would have exited, giving him 4 points and the win.
Both sides made mistakes and both sides made some brilliant plays. And I think the luck balanced out (getting 8 VP from Walking Wounded events, if he had been able to exit that last squad, could probably be considered pretty lucky, but then Mark had some really bad luck with dice rolls too).
I really enjoyed this one. Mark is a great guy and a great opponent and I hope to meet up with him again soon for a rematch.
This puts me at 5-1 on the Ladder, and I think in the Top 5. Next month’s scenario could be a doozy.
Combat Commander Ladder – After Action Reports
To see all of my Ladder After Action Reports since May 2021, go here!
What an exciting session report! That Pillbox was a fantastic vantage point for you, but even after losing it you did not gave up! This is exactly spirit of CCE!
LikeLiked by 1 person
Yeah, I didn’t give up, but I knew I was hanging on by a thread. One more round and I was probably done for. Though I did have my one leader in the north who, even with a 6 morale, was actually not doing too badly.
LikeLiked by 1 person
Pingback: Combat Commander – After Action Report – Scenario #112 – Sonnenwende – Dude! Take Your Turn!
Pingback: Combat Commander – After Action Report – Scenario #23 – No-Man’s Land – Dude! Take Your Turn!
Pingback: Combat Commander – After Action Report – Scenario #34 – Encircled at Hill 30 – Dude! Take Your Turn!
Pingback: Combat Commander Pacific – After Action Report – Scenario A – Grassy Knoll – Dude! Take Your Turn!
Pingback: Combat Commander Pacific – After Action Report – Scenario M6 – Breakout – Dude! Take Your Turn!
Pingback: Combat Commander Europe – After Action Report – Scenario 51 – The Uneasy Wait – Dude! Take Your Turn!
Pingback: Combat Commander Europe – After Action Report – Scenario 65 – Road Trip – Dude! Take Your Turn!
Pingback: Combat Commander Europe – After Action Report – Scenario 75 – Sturmgruppe Beton – Dude! Take Your Turn!
Pingback: Combat Commander Europe – After Action Report – Scenario 90 – The Man Who Would Be King – Dude! Take Your Turn!
Pingback: Combat Commander Europe – After Action Report – Scenario LoM9 – Operation Mercury – Dude! Take Your Turn!
Pingback: Combat Commander Europe – After Action Report – Scenario #119 – Sky Fall – Dude! Take Your Turn!
Pingback: Combat Commander Europe – After Action Report – Scenario #9 – Rush to Contact – Dude! Take Your Turn!
Pingback: Combat Commander Europe – After Action Report – Scenario #14 – At the Crossroads – Dude! Take Your Turn!
Pingback: Combat Commander Europe – After Action Report – Scenario #30 – Red Skies at Night – Dude! Take Your Turn!
Pingback: Combat Commander Pacific – After Action Report – Scenario E – West Tank Barrier – Dude! Take Your Turn!
Pingback: COMBAT COMMANDER PACIFIC – AFTER ACTION REPORT – SCENARIO M4 – TEMPLETON’S CROSSING – Dude! Take Your Turn!
Pingback: Combat Commander Europe – After Action Report – Scenario #41 – The Commissar House – Dude! Take Your Turn!
Pingback: Combat Commander After Action Report – Scenario #53 – Deeds Not Words – Dude! Take Your Turn!
Pingback: Combat Commander After Action Report – Scenario #67 – The Orient Express – Dude! Take Your Turn!
Pingback: Combat Commander After Action Report – Scenario #82 – Hidden Guns Lash Out – Dude! Take Your Turn!
Pingback: Combat Commander After Action Report – Scenario #91 – The Battle of Trafalgar – Dude! Take Your Turn!
Pingback: Combat Commander After Action Report – Scenario LoM #8 – Codes in the Sunrise – Dude! Take Your Turn!
Pingback: Combat Commander After Action Report – Scenario #105 – La Fiere Counterattack – Dude! Take Your Turn!
Pingback: Combat Commander After Action Report Supplemental – Scenario #28 – No Ingouf Around – Dude! Take Your Turn!
Pingback: Combat Commander After Action Report – Scenario #10 – Commando School – Dude! Take Your Turn!
Pingback: Combat Commander After Action Report Supplemental No. 2 – Scenario #92 – Let England Shake – Dude! Take Your Turn!
Pingback: Combat Commander After Action Report – Scenario #20 – A March in December – Dude! Take Your Turn!
Pingback: Combat Commander After Action Report – Scenario #33 – We Go! – Dude! Take Your Turn!
Pingback: Combat Commander – After Action Report – Scenario L – Slopes of Hell – Dude! Take Your Turn!
Pingback: Combat Commander – After Action Report – Scenario M10 – Bulolo River Bridge – Dude! Take Your Turn!
Pingback: Combat Commander – After Action Report – Scenario 44 – Stalingrad of the North – Dude! Take Your Turn!